
Results 441 to 450 of 20508
 91297Likes
Thread: What are you working on?
 LinkBack URL
 About LinkBacks
-
08-02-2014, 07:26 PM #441Aggressive Shaving Addict


- Join Date
- Feb 2014
- Location
- Kennett Square, PA
- Posts
- 157
Thanked: 12
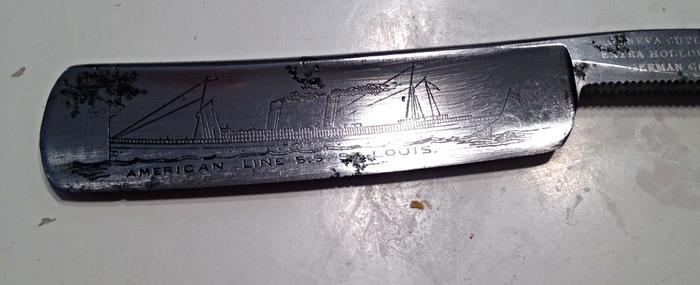
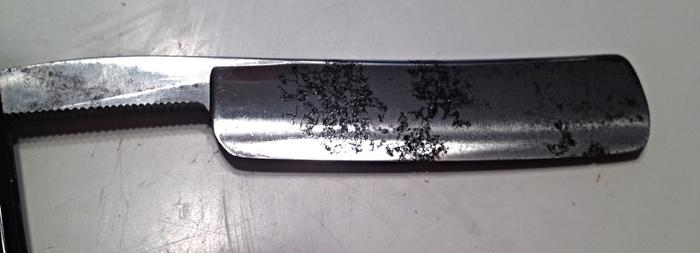
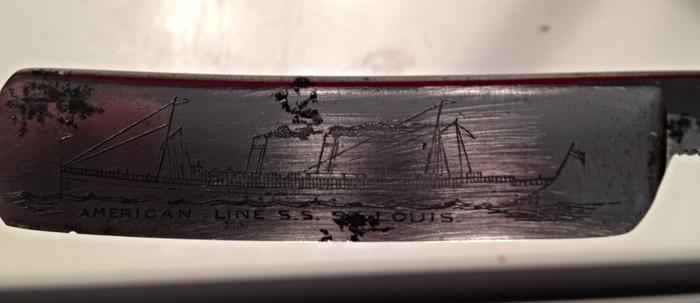
Curious on how to clean this old girl up without damaging the awesome etching...

-
08-02-2014, 07:32 PM #442Senior Member

- Join Date
- Aug 2013
- Location
- St. Louis, MO
- Posts
- 194
Thanked: 31
Hard to be sure from the picture, but that etching looks pretty deep. Also, the worst of the pitting does not overlap the etching. I've seen threads in which people describe using transparent nail polish to cover an etching, then sand around it, later removing the polish with acetone. If I were working on this razor, I might try that method. The reverse side wouldn't present a problem--just ordinary buffing or sanding, over the whole blade, would do the trick. Originally Posted by DickWhitman

Joeengine46 likes this.
-
08-02-2014, 07:52 PM #443
Thank you Hart, I greatly appreciate it!!!!
-
08-02-2014, 09:11 PM #444Senior Member

- Join Date
- Apr 2013
- Location
- Slovenia
- Posts
- 489
Thanked: 83
last few days for me were around making of this ring,.. concrete composite and polished ebony.. took me some tricks to get to the end (concrete isn't very cooperative, but i had to use it..)


 HARRYWALLY and RezDog like this.
-
08-02-2014, 11:53 PM #445Senior Member


- Join Date
- Jul 2013
- Location
- Kitsap County, WA USA
- Posts
- 1,549
Thanked: 351
Originally Posted by DickWhitman
That's a very nice etch... and probably some very deep pitting under the black. It depends what kind of end product you are looking for. If you want to get rid of the pitting AND save the etching then send it out to a pro. If you are ok with some pitting and want to the black gone, then put it in a vibratory tumbler with walnut media for a few days. There is also a pretty good chance the rust wont be spreading very much more, so you can polish, oil, sharpen and shave and call it good. I would love to see how it turns out, keep us posted.
MattThe older I get the more I realize how little I actually know.
-
08-03-2014, 01:14 AM #446Aggressive Shaving Addict
- Join Date
- Feb 2014
- Location
- Kennett Square, PA
- Posts
- 157
Thanked: 12
Will do! Thanks
-
08-03-2014, 04:58 PM #447I love Burls....... and Acrylic


- Join Date
- Mar 2012
- Location
- Baden, Ontario
- Posts
- 5,475
Thanked: 2284
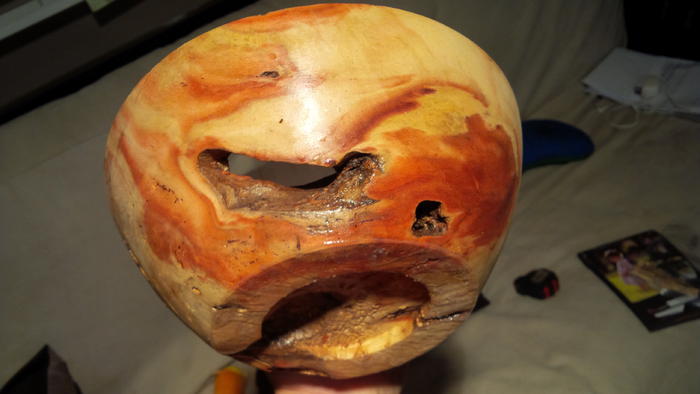
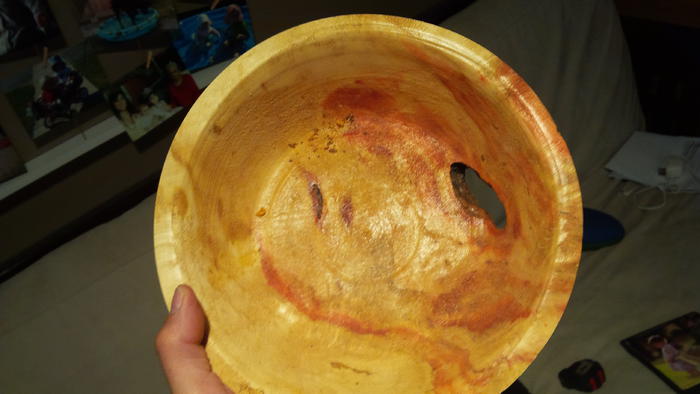
Rough turned a Box Elder burl I cut a while back, post #152. Very happy with what I found underneath. Tons of red going through this box elder. Socked the wood hardener to it to try and save some punky areas. Should turn out to be a nice bowl once it dries a bit more.
My wife already told me she's keeping it.
 Burls, Girls, and all things that Swirl....
-
08-03-2014, 10:03 PM #448'with that said'

- Join Date
- Aug 2010
- Location
- Walla Walla in WA State USA
- Posts
- 11,156
Thanked: 4230
I'm a FIRM believer in starting High and working low to see what you have! Those that start Low tend to end up destroying the heart and soul of a razor. Here's an example of what I mean by starting High. Originally Posted by DickWhitman
I'd scuffed the blade with some 1K grit W&D sandpaper then worked lower and then back up to 2K then Mothers Mag Wheel Polish the scales were cleaned up with Bumper Black and 3M Hard Plastic Polish.
http://straightrazorpalace.com/custo...n-cleanup.html
While the etching does look deep there is no need to erase anymore than need be to clean up the blade to your specs
Personally, I'd start with the Mothers and see what you have. Remember, you can always go lower but IF you go TOO LOW then you have to work much harder to remove the heavy scratches
I hope this helps.Our house is as Neil left it- an Aladdins cave of 'stuff'.
Kim X
-
The Following User Says Thank You to cudarunner For This Useful Post:
Jdefoy66 (03-14-2017)
-
08-03-2014, 10:43 PM #449Senior Member

- Join Date
- Feb 2012
- Location
- Menominee,MI
- Posts
- 1,624
Thanked: 325
I agree with the above. I usually start with some mothers polish to see what I have to work with. Sometimes I will start with 1k if it looks like mothers won't do much. If I have to I will go lower than work my way back up, but like said above the lower you go the more you will have to do to work your way back up. I find that most times I had to compromise and leave some pitting in order to save an etch or lose an etch to get rid of pitting. Those nice deep etches give you more room to work with, but I try not to make them too shallow because I find them to look better deep with some pitting rather than shallow or gone with no pitting. In the end though it comes down to what you want the end result to look like and what you are willing to do to get to that result, but the very first thing I always do now and I learned this the hard way is to take the razor to some stones and make sure I can put an edge on it. I spent alot of time on cleaning up some razors just to find out that the edge was so badly pitted or corroded that it wasn't worth the effort so now the razors hit the stones just to make sure. Good luck.
-
08-03-2014, 10:56 PM #450Senior Member


- Join Date
- Jun 2013
- Location
- Gladstone QLD AUSTRALIA
- Posts
- 3,245
Thanked: 804
making a CA coated Meranti pine box for a B'day present str8 & cleaning up an old strop to go with it,
& a W&B wedge restore for me, a mystery hardwood 3 blade box for the hell of it & about a dozen or so other Str8s in line to still do.HARRYWALLY and carrolljc like this.Saved,
to shave another day.


 Reply With Quote

