
Results 1 to 10 of 16
 5Likes
 LinkBack URL
 About LinkBacks
-
11-17-2009, 12:00 AM #1< Banned User >

- Join Date
- Apr 2008
- Location
- Newtown, CT
- Posts
- 2,153
Thanked: 586 You Can Make A Wedge! The Icedog Method
We are very fortunate in this community to share the company of many teachers, artists, craftsmen and generally fine and knowledgeable gentle-people. Although membership in Straight Razor Place comes with no warrantees, it is a safe bet that at least one answer will be available for any question that may arise. In those questions regarding woodworking, there will always be at least two answers. The question today is, when re-handling a straight razor, what is a safe and efficient method to fabricate the wedge between the scales opposite the pivot.
First a material for the wedge must be selected. Aesthetically we like everything from a strong color contrast with the scales to no contrast at all as can be seen some modern razors (Filarmonica 13), you can find plastic scales that have the wedge as part of the casting process. That is, the handles are molded with one half of a wedge on each scale. I have made wedges from a blank made from laminated veneers, effectively a striped wedge. Wedges are a completely subjective subject. In this example, we are making a wedge for a razor that belongs to SRP member Wulfgar. The scales are Gabon ebony and he has decided the wedge should be holly. Holly is a pure white, very dense wood with grain so straight and tight that it seems to have no character at all. This procedure is equally effective whether you select wood, plastic, metal, bone or stone for your wedge.
Beginning with a thick enough¹ piece of the chosen material, cut a strip about 25% wider than the final wedge will be (if the finished wedge will be one inch wide, cut your blank 1 1/4" “). The wedge (during normal conditions) is subject to only compressive stress. However, it is important for uniformity of finish to match the grain direction with the scales. Note: If the wedge and scale materials are metallic, plastic or something else with no discernable grain, “grain direction” is immaterial. The strip must be as long as the finished wedge plus enough to facilitate handling while tapering. I typically will make my wedge blanks 4 to 5 inches long.
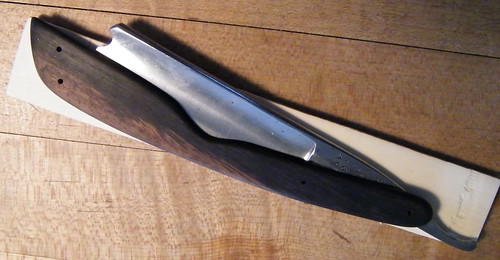
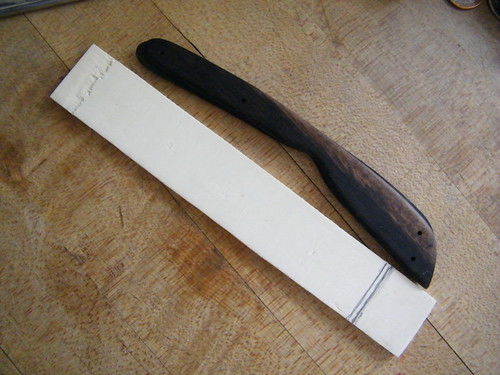
Lay the new scales out with the wedge strip blank.
Mark the position of the thick end of the finished wedge. The thick end is inboard so that you taper from inboard to the end. In other words, the wedge will be tapered toward the end of the blank, like a chisel.
Once the strip is fully prepared, you are ready to begin tapering. You can taper manually with a rasp, Microplane™, hand plane or a sanding block. You can also use sandpaper flat on a hard surface (glass, MDF, plywood or bench top)

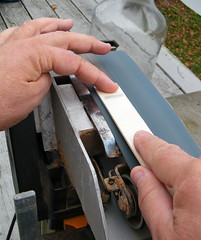
If you don’t have access to a disc or belt grinder is very easy to taper your wedges with a hand held belt sander clamped to a sturdy table.
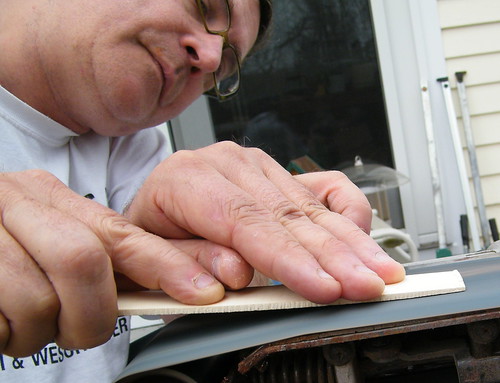
Taper one or both sides of the wedge. Working only one side is perfectly acceptable as the inside end (the thick end) will be adjusted or “squared up” after your wedge is cut from the strip.
1 “Thick enough” means the at least the thickness of the desired wedge at its maximum. It is better to begin with stock that is approximately 25% thicker than the thick end of the desired wedge.1
Last edited by icedog; 11-17-2009 at 09:07 PM.
Mcbladescar and Chevhead like this.
-
-
11-17-2009, 12:10 AM #2< Banned User >
- Join Date
- Apr 2008
- Location
- Newtown, CT
- Posts
- 2,153
Thanked: 586
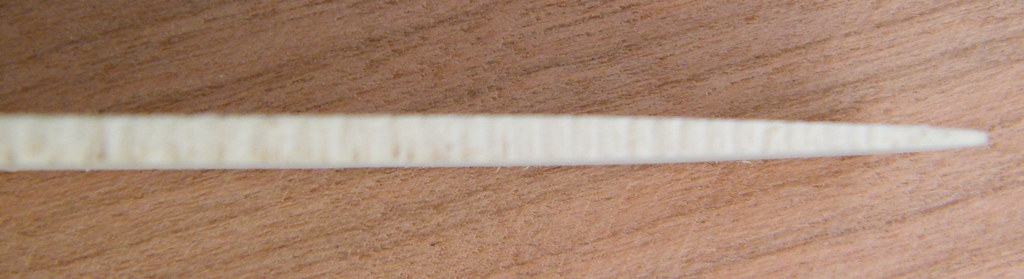
Your goal is to have two flat surfaces that taper from full thickness (at your length mark) down to a point at the end of the strip.

Once you are satisfied with the taper, cut the entire end off the strip being sure to save the entire tapered portion. Again, be sure to cut through the strip above the taper.
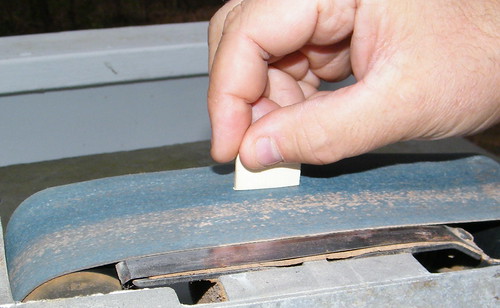
If you shaped your wedge by sanding only one side, once it is cut from the strip, it will appear to be a right triangle. Functionally this doesn’t matter at all. However, if you are like me and go through life tortured by all things asymmetrical, this razor won’t become your sworn nemesis. It is very easy to use sandpaper and “square up” the large end of the wedge. (I know it’s not really “square”. That’s just what we call it when we even up the angles on something like this.)
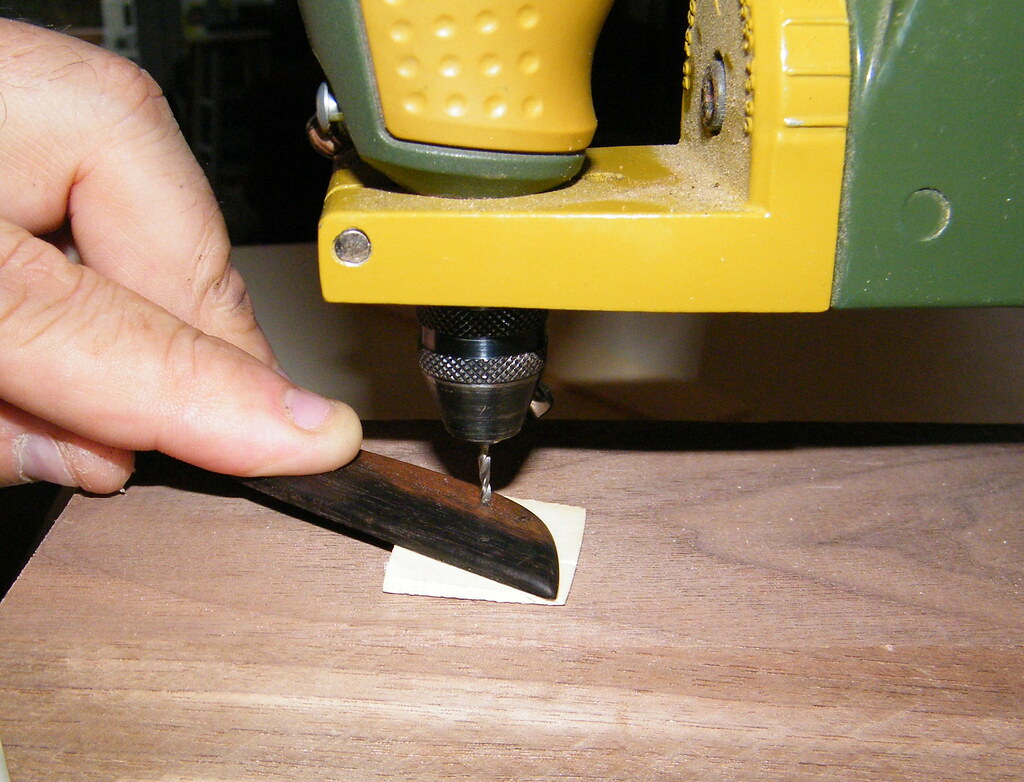
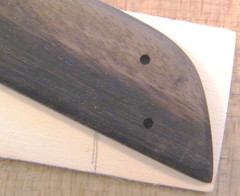
This is where it all starts to come together. This is also where it can all fall apart. Carefully position your wedge in between the scales and, using the scales as a template, drill the hole(s) through your wedge.

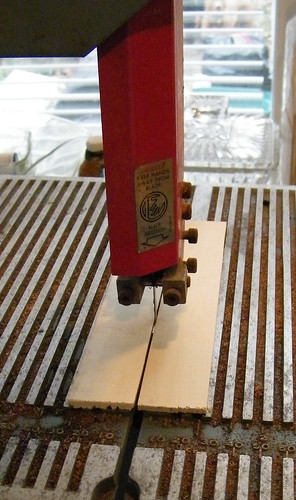
I use 0-80 x ½ machine screws and nuts as temporary pins to hold the assembly together while shaping the profile of the wedge. Take your time. Be mindful of grain direction, especially if you are carving the wedge with a sharp knife. If you attack that little bit of wood with your X-ACTO™ knife, the blade will follow the path of least resistance and, if given the opportunity, will split the wedge right in two. I use the band saw to get close then finish by abrading the wedge to its final shape.
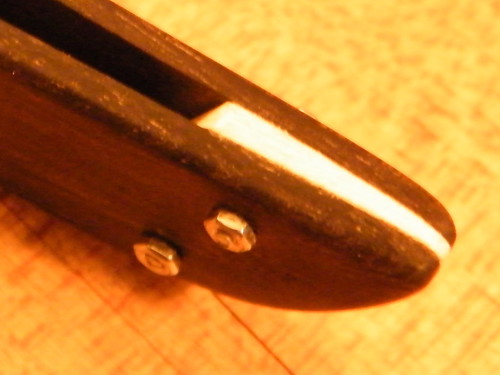
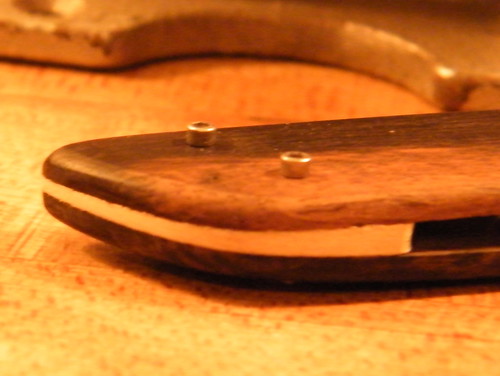
Not bad eh? And I still have all my fingers!
Last edited by icedog; 11-17-2009 at 12:13 AM.
-
The Following 29 Users Say Thank You to icedog For This Useful Post:
Alfonnso (05-24-2012), baldy (11-17-2009), BDom (11-17-2009), BigJim (05-01-2011), Buckler (09-09-2010), Chevhead (11-08-2015), Cove5440 (11-17-2009), crankymoose (01-02-2010), decraew (11-17-2009), Fenian (09-21-2012), fpatton (01-03-2010), Geezer (10-22-2010), hi_bud_gl (11-17-2009), randydance062449 (07-04-2011), regularjoe (10-15-2011), richmondesi (11-17-2009), SavantStrike (11-17-2009), ScottGoodman (11-18-2009), ScoutHikerDad (11-25-2013), sffone (01-01-2010), shutterbug (11-17-2009), sparticius (11-26-2009), spazola (11-17-2009), Str8Raz0r (06-16-2011), Terje K (02-18-2012), WadePatton (12-10-2013), Walt (11-17-2009), wukong (10-15-2011), Wulfgar (11-17-2009)
-
11-17-2009, 12:15 AM #3Senior Member


- Join Date
- Nov 2005
- Posts
- 4,521
Thanked: 1636
Thank You great post.
-
The Following User Says Thank You to hi_bud_gl For This Useful Post:
icedog (11-17-2009)
-
11-17-2009, 12:16 AM #4Little Bear


- Join Date
- Jan 2009
- Location
- Shreveport, LA
- Posts
- 1,741
Thanked: 760
Not bad at all. Very cool step by step guide. Thanks!
-
The Following User Says Thank You to richmondesi For This Useful Post:
icedog (11-17-2009)
-
11-17-2009, 12:26 AM #5< Banned User >
- Join Date
- Sep 2009
- Location
- CT Chilly Northest
- Posts
- 85
Thanked: 11
now i know and knowing is half the battle!
thanks brothir!
-
11-17-2009, 01:04 PM #6Senior Member

- Join Date
- Mar 2007
- Location
- Montreal, Quebec
- Posts
- 610
Thanked: 147
Super post.
I wouldn't change a thing, since that's more or less the same method I use
-
The Following User Says Thank You to floppyshoes For This Useful Post:
icedog (11-17-2009)
-
11-17-2009, 03:34 PM #7Comfortably Numb

- Join Date
- Jan 2009
- Location
- Charlotte, NC
- Posts
- 2,095
Thanked: 668
Great post, kind of what I like to do.. thanks for the play by play
-
The Following User Says Thank You to Del1r1um For This Useful Post:
icedog (11-17-2009)
-
11-18-2009, 02:01 AM #8Hones/Honing/Master Barber

- Join Date
- Aug 2009
- Location
- Waynesboro, PA
- Posts
- 997
- Blog Entries
- 6
Thanked: 199
Excellent post!
You should put it in the Wiki
-
The Following User Says Thank You to avatar1999 For This Useful Post:
icedog (11-18-2009)
-
11-18-2009, 10:44 AM #9< Banned User >
- Join Date
- Apr 2008
- Location
- Newtown, CT
- Posts
- 2,153
Thanked: 586
Great idea! Okay, it's in the Wiki. Originally Posted by avatar1999

-
11-18-2009, 07:42 PM #10Senior Member

- Join Date
- Dec 2006
- Location
- Mount Airy, North Carolina
- Posts
- 195
Thanked: 188 Making Wedges!
Really nice and informative post! Simple from start to finish
Ronnie
-
The Following User Says Thank You to RonnieNC For This Useful Post:
icedog (11-18-2009)


 Reply With Quote