
Results 1 to 10 of 40
 13Likes
 LinkBack URL
 About LinkBacks
-
08-05-2008, 06:18 PM #1At this point in time...


- Join Date
- Jun 2007
- Location
- North Idaho Redoubt
- Posts
- 26,960
- Blog Entries
- 1
Thanked: 13226 An Illustrated Guide to Un-pinning and Re-pinning
With all the questions and such that come up on pinning razors, I decided to take the time and some pics, and put this together, while I was on this next restore.... I apologize for some of my pics in advance I just ain't that good
")
We are starting with a DD Reaper that is going though a complete restore... So first I am going to pop the pins... There are a few ways to do this, and if I were intent on keeping the scales, I might use one of the other ways ie: a drill press or Dremel to drill out the pins... For this guide, I used the least expensive tools, and NO power tools so it would be of the most benefit, to the most people...... (these scales are shot, they are rotted through, even though it doesn't show in the pics)
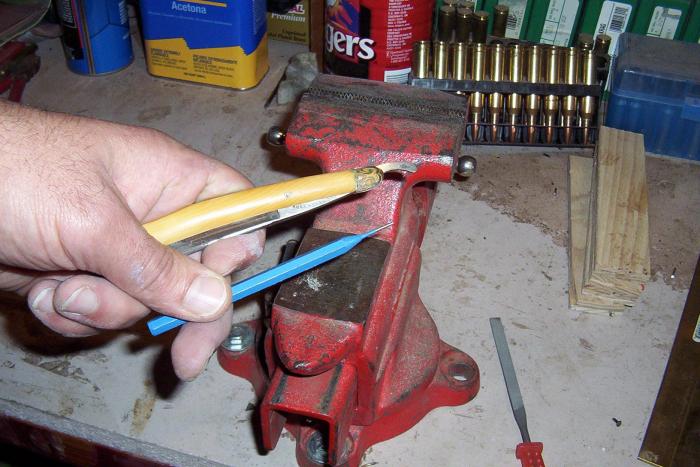
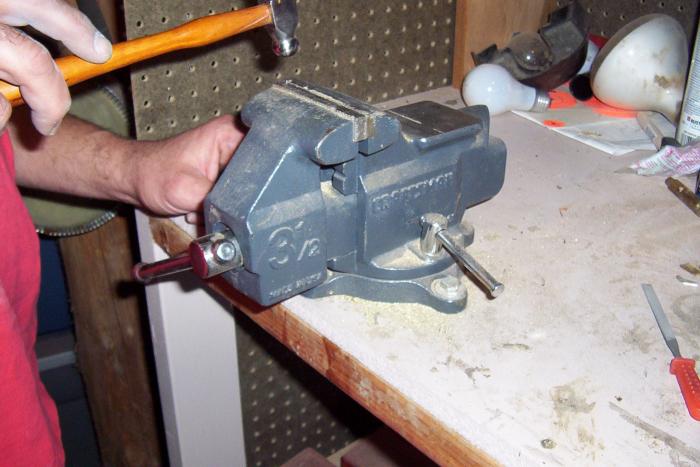
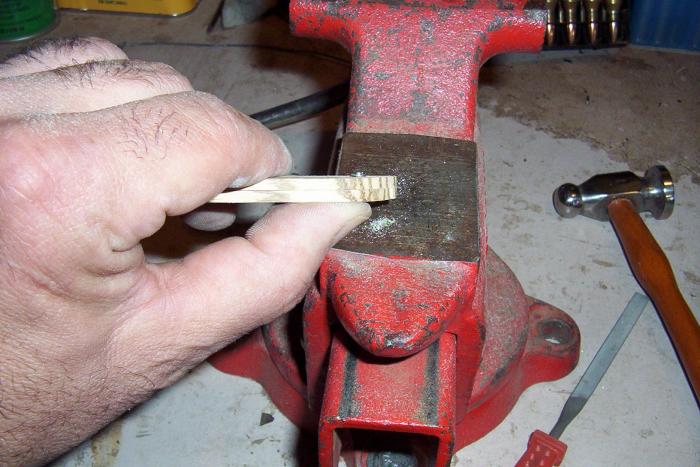
Always start on the back side of the razor,
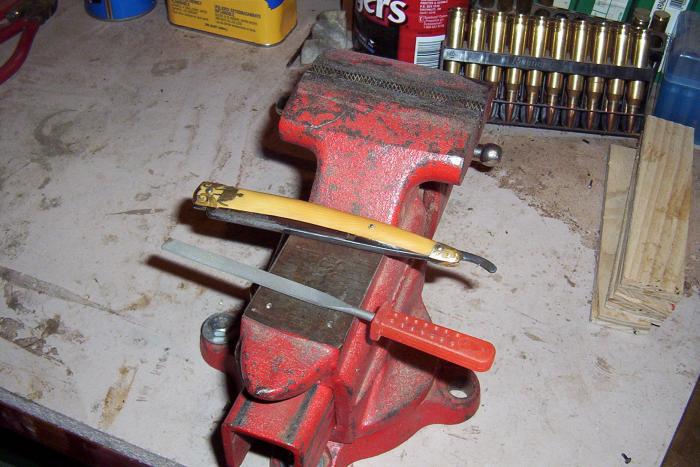
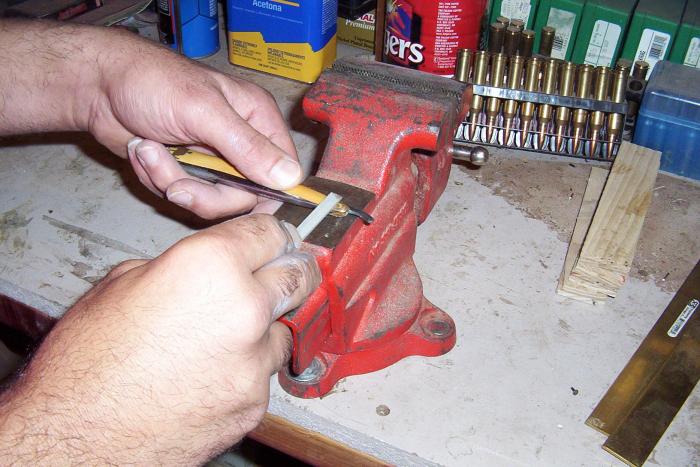
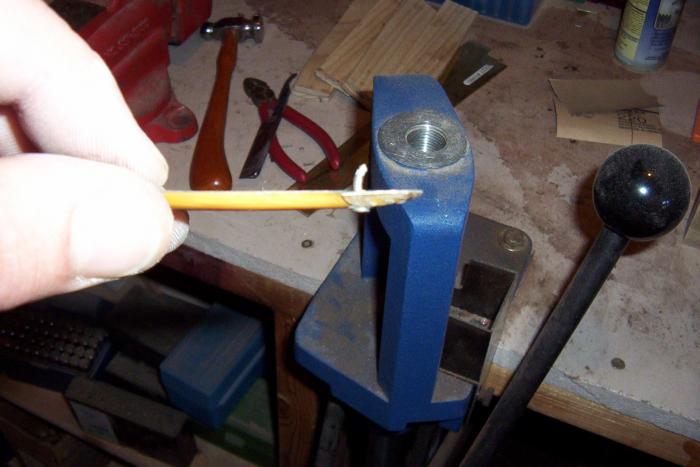
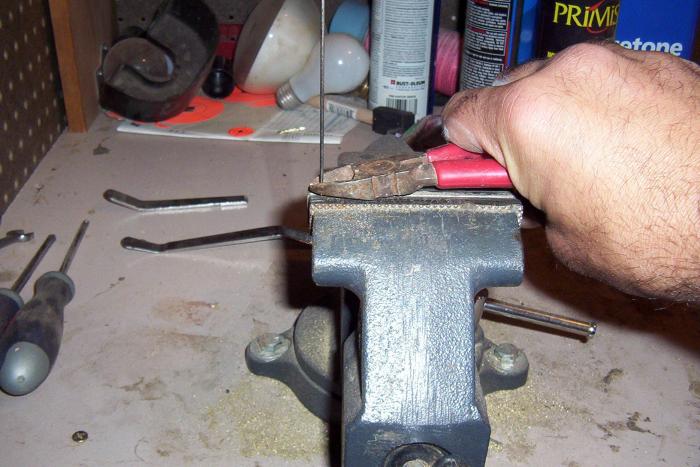
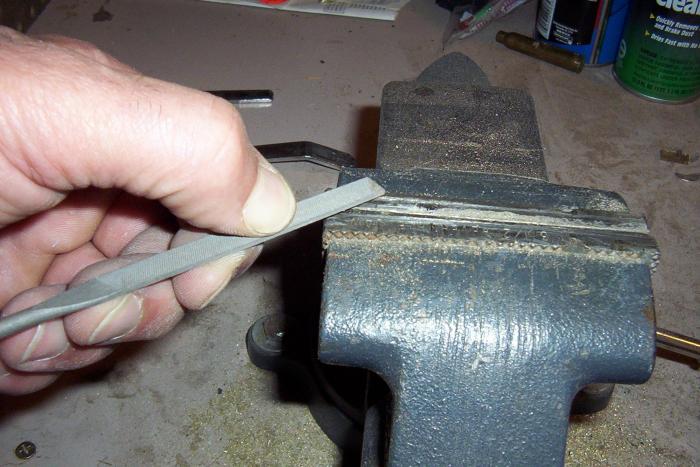
if there is going to be a locking collar, it will be on the back side, this DD has them...If you look close you will see that the razor is held steady in one of the small dimples that I have drilled into the anvil side of the bench vise.... I file gently, and slowly, until that collar pops off, then I use a 1/16 drift pin to tap the pins out... I tried to show why a lot of these scales will crack when you do this, it is not yer fault, look at how bent up these pins are when they come out.... So go SLOW you might save the scales.... once the razor is released I take out the center pin, then the wedge pin, and break the razor all the way down.... All I used here was the file, the drift pin, (any small pointy thingy) and a jewelers hammer, oh yeah, and a bench vise......
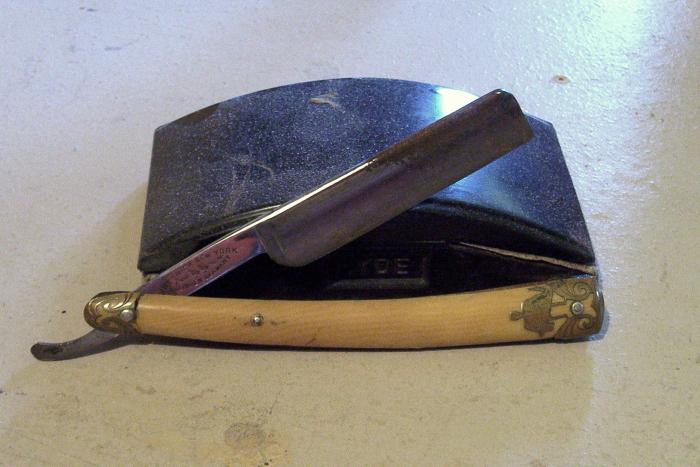
The front side or Show side of every razor (note direction not the name plates)
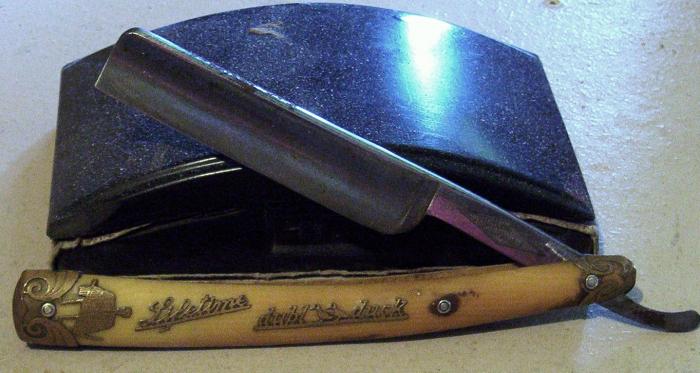
The back side of every razor ( I have heard of left handed razors out there, but have never actually seen one, they would be reversed)
Here are some pics of what I was talking about above......
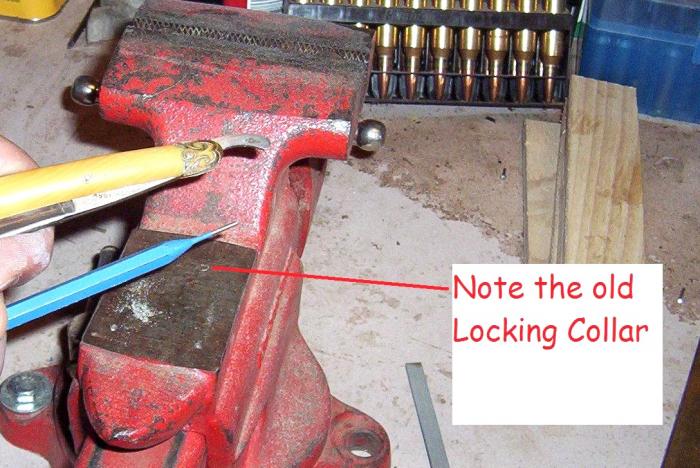
Note the small dimple in the anvil...pic 1
Note the collar next to the drift pin on pics 3 & 4
Last edited by gssixgun; 08-06-2008 at 02:32 AM.
-
The Following 8 Users Say Thank You to gssixgun For This Useful Post:
andrewmurray86 (05-26-2014), awk5 (10-03-2008), boballman (02-13-2011), etorix (02-19-2013), Leofric (10-31-2008), MW76 (02-06-2016), netsurfr (08-05-2008), porridgeorange (02-12-2011)
-
08-05-2008, 06:35 PM #2At this point in time...
- Join Date
- Jun 2007
- Location
- North Idaho Redoubt
- Posts
- 26,960
- Blog Entries
- 1
Thanked: 13226 More pics on Un-pinning
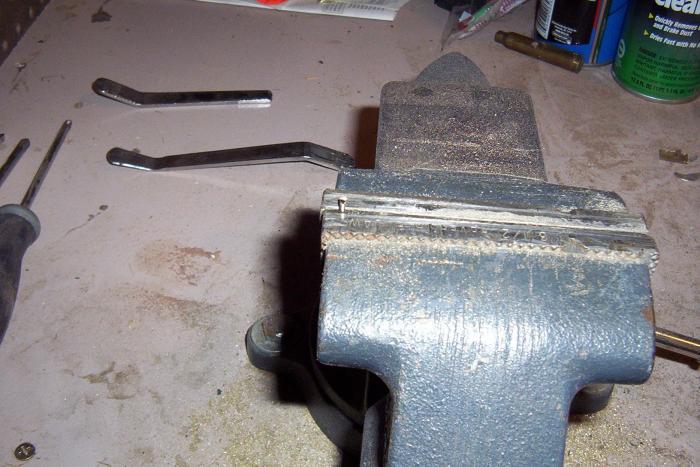
Note: how I used the jaws of the vise just barely opened to set the razor on while I gently tap out the pins.....
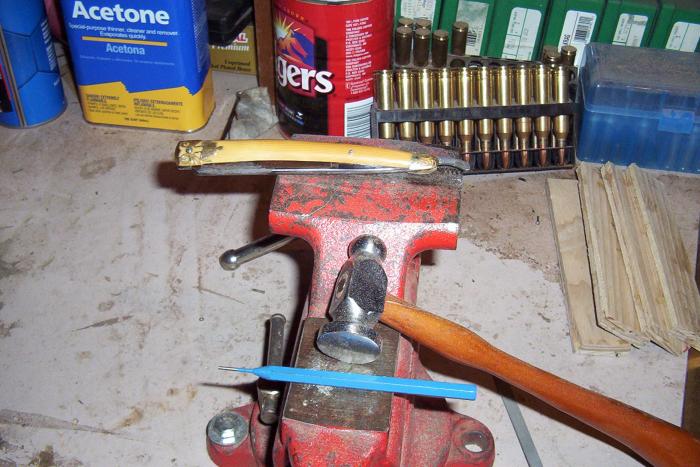
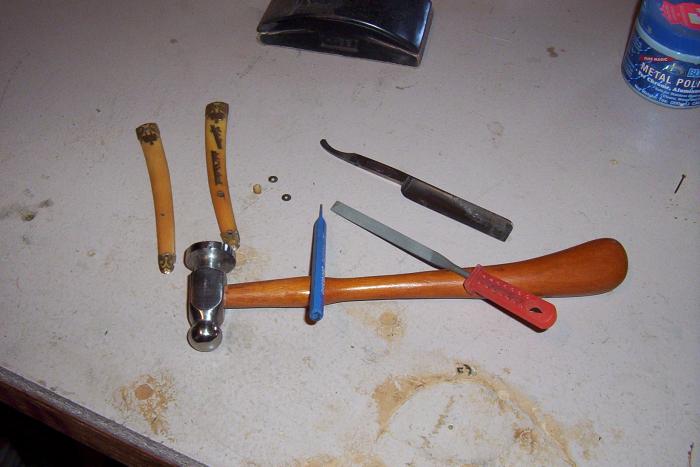
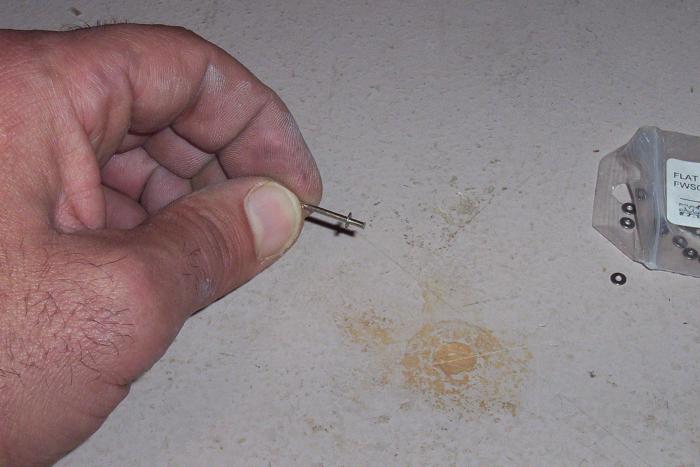
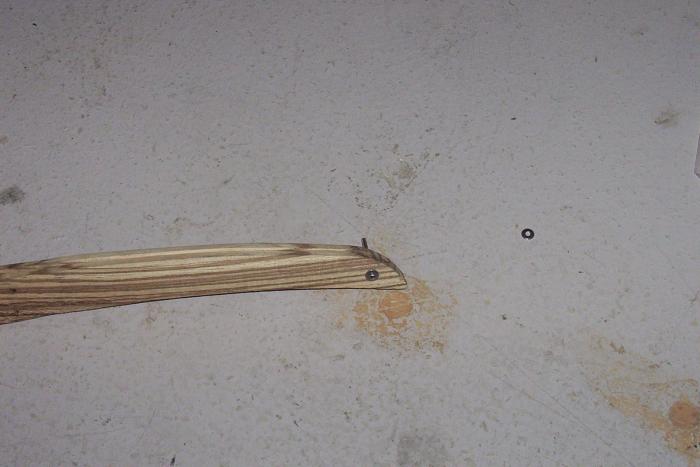
Now these are some bent pins coming out of this DD, There was no indication of that until I tapped the pins out BTW..... what really surprised me was the the Wedge pin is bent also that is unusual.
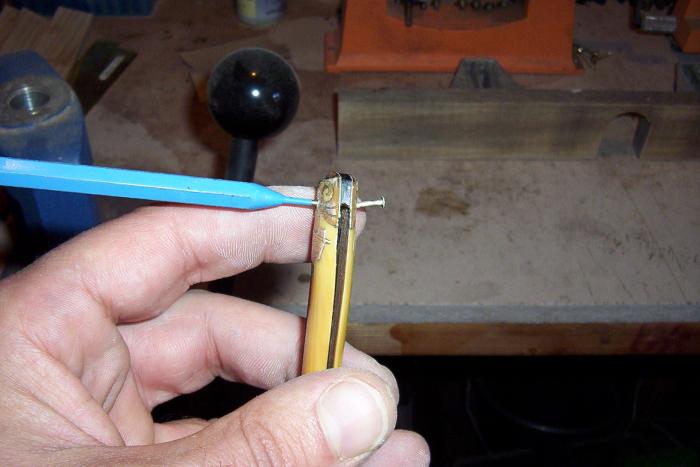
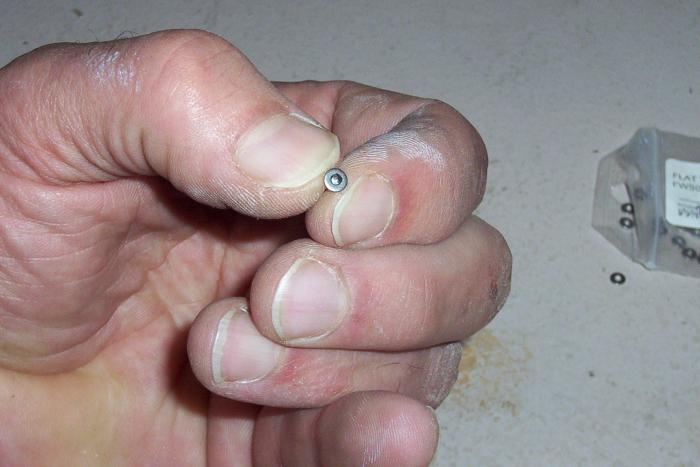
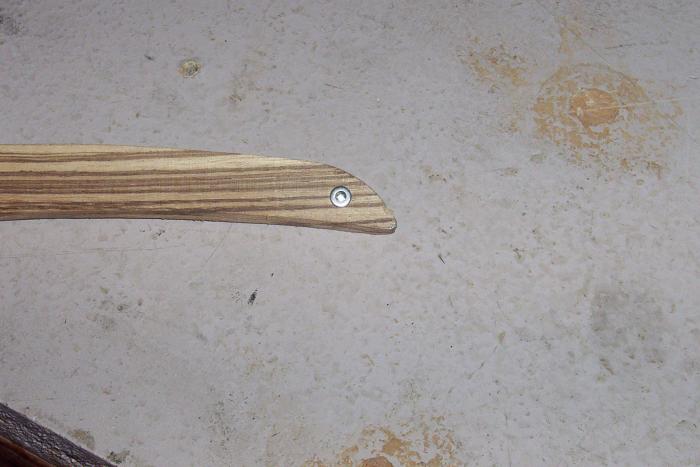
A completely disassembled razor here in pic 4, note how I kept the center pin spacer, and the nice thin thrust washers.... I will clean these up and use them on the new scales for this razor.... This one will go back together using Yellowheart wood scales with the brass inlays from the original scales on there, but that's another thread that Dan / Floppyshoes and I are going to do together
Next: Is how to make and re-pin yer scales coming up below...
Last edited by gssixgun; 08-05-2008 at 08:22 PM.
-
The Following 14 Users Say Thank You to gssixgun For This Useful Post:
Ben325e (08-21-2008), boballman (02-13-2011), Buckler (08-17-2008), ContenderhunterPA (10-26-2009), etorix (02-19-2013), Fierce30rus (02-12-2011), Jesse1973 (09-09-2008), MW76 (02-06-2016), netsurfr (08-05-2008), nipper (03-13-2012), peribeca (03-12-2012), porridgeorange (02-12-2011), recon (02-16-2009), seanreum1 (10-08-2014)
-
08-05-2008, 07:00 PM #3At this point in time...
- Join Date
- Jun 2007
- Location
- North Idaho Redoubt
- Posts
- 26,960
- Blog Entries
- 1
Thanked: 13226 Making and re-pinning yer razors
This is going to be a simple re-pin, there are tons of ways to make these even prettier, but those are on other threads.....
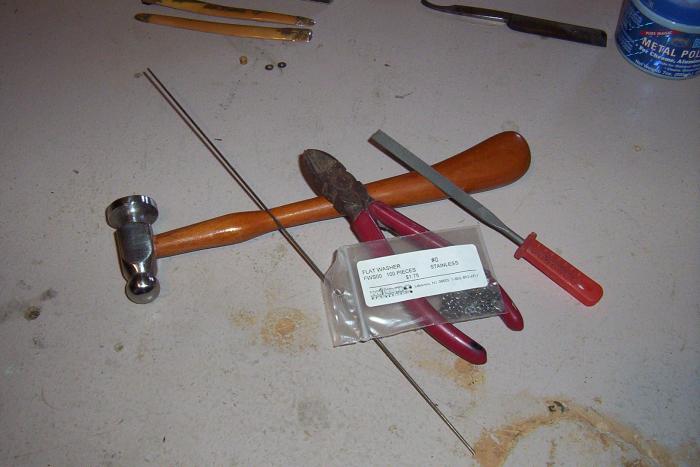
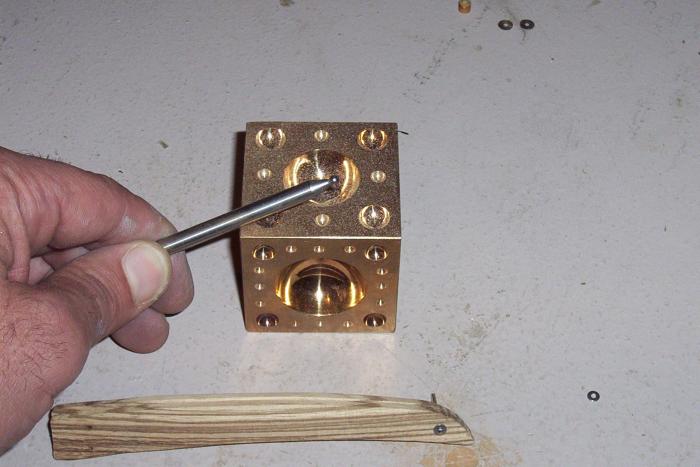
You need 1/16 rod, I use Brass or Nickel Silver (this one is NiAg)
some washers, these are #0 SS from Microfasteners some cutters, a file, and a jewelers hammer, or small ballpeen.....
I am doing these with the least amount of tools, you can make a pinning block, out of any piece of solid steel like a jewelers block but that starts to get into another area....
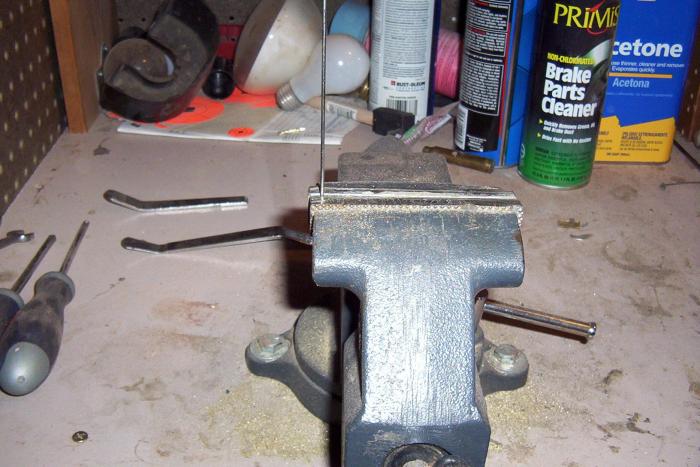
Notice I switched to another vise here the blue one has smooth jaws, the red one above has griped jaws they are changeable, I am just lazy, and have 2 different ones.... You do not want to tighten down on the soft rod with the crosscut grip style jaws....
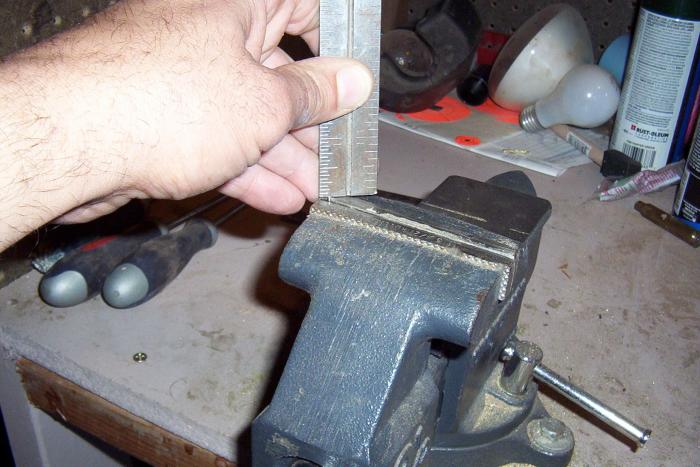
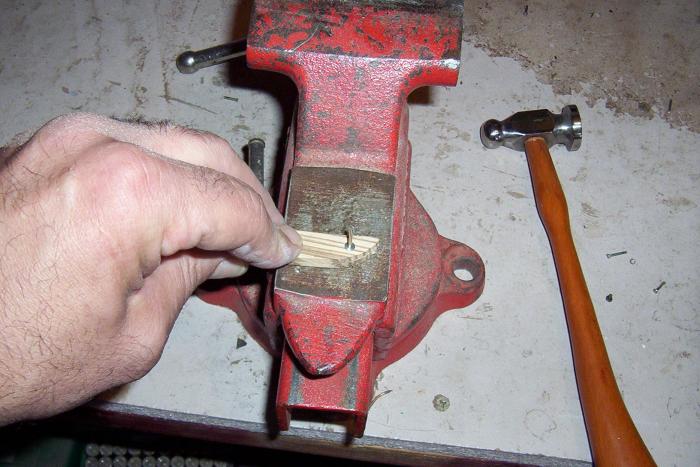
You need about 3/4 of an inch of rod, I cut it off at about 1/16 inch above the jaws, and make sure the rod is straight in there... I then file it down nice and smooth and flat so the peening is easier...
Tap, don't hammer, using the ball end of the hammer, the hammer doesn't even move 1 inch above the pin, it just kinda bounces off there almost no force.....
The pin will peen out enough to hold a washer,( this is a straight style vintage pin you could use a Doming & Dapping set to make domed washers) then you slip one washer on, and slide the assembly though the scales and razor to be pinned (wedge first, then center then pivot) here I am just using a scrape set to show this with)
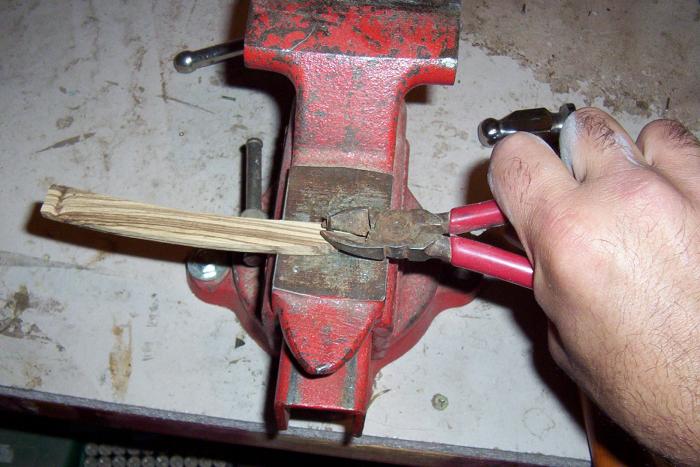
Cut the pin off the back side then file that down to about 1/16 above the second locking washer
Start again with a nice flat smooth surface and start tapping again same way that did on the other side... Tap Tappity Tap, until you lock in the washers and get a nice clean peen.... It really is that easy.... Oh yeah flip the razor to the other side and tap that again too..... Nice and straight and gentle...
All of the stuff that you need...
Start with the rod as straight as possible here
Any type of cutters will work you are going to clean up the end in the next step
This is very important to the finished look so take a little extra care when filing the rod flat....
OK really, you don't have to measure this, I just did it so ya had an idea, just so long as it sticks up a little, it is fine.....
Last edited by gssixgun; 08-05-2008 at 11:00 PM.
-
-
08-05-2008, 07:20 PM #4At this point in time...
- Join Date
- Jun 2007
- Location
- North Idaho Redoubt
- Posts
- 26,960
- Blog Entries
- 1
Thanked: 13226 More pics on re-pinning
pics 7-12
Tap tap tap
Slide on the washer for a lock...Keep in mind that this can be done without a locking washer too, some of the older razors were done with just a peened pin, however I do not advise it...
This is a Doming & Dapping set, these can be used to produce Domed washers using one technique, there is another technique using tubing hidden away in the deep dark recesses of SRP....
Last edited by gssixgun; 08-05-2008 at 10:02 PM.
-
-
08-05-2008, 07:42 PM #5At this point in time...
- Join Date
- Jun 2007
- Location
- North Idaho Redoubt
- Posts
- 26,960
- Blog Entries
- 1
Thanked: 13226
Pics 13-17
Again clip it off about 1/16 of an inch from where ya need it to be so you can file it nice and smooth...
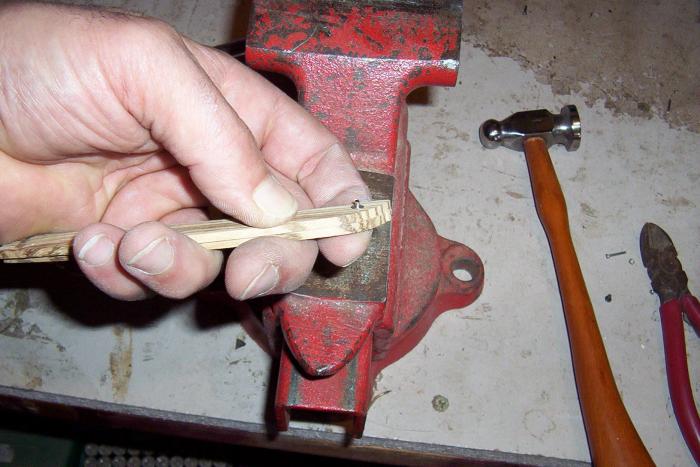
Note I filed the pin down here between these two pics see the difference in height of the pin
Ever so gently here, you need to lock the washer in

A finished Pin!!!!!!
Again, I will say that there are other ways to accomplish this entire process, in fact I use a few different ones, but this is the easiest, and least expensive way, that doesn't require a lot of expenditure for tools etc: that I have found......
If you would like to add some other tips to this thread, please feel free, but please include pics of what yer doing, as they say one picture is worth a thousand words.....Last edited by gssixgun; 08-05-2008 at 11:01 PM.
-
The Following 34 Users Say Thank You to gssixgun For This Useful Post:
alvydas (01-10-2016), anesthesia (04-09-2012), Bart (08-05-2008), BeBerlin (09-14-2008), boballman (02-13-2011), boshave (01-02-2010), ContenderhunterPA (10-26-2009), cudarunner (04-11-2011), deanfarris (10-31-2012), jfleming9232 (11-01-2012), jmercer (01-24-2015), Joelski78 (08-05-2008), jplamarre (09-10-2010), MarkinLondon (02-22-2011), moostashio (12-31-2013), MW76 (02-06-2016), ne0nblakk (12-24-2013), netsurfr (08-05-2008), nipper (02-12-2011), nurse42312 (08-07-2008), Oldnick (04-25-2016), Pauly (02-14-2011), peribeca (03-12-2012), porridgeorange (02-12-2011), quinlan (07-04-2010), Roccman (12-01-2012), ScottGoodman (10-28-2009), sidneykidney (08-07-2008), skipnord (04-05-2012), Snake (02-14-2011), sparticius (12-02-2009), Str8Raz0r (05-16-2011), Terje K (03-30-2012), tictac (01-30-2016)
-
08-05-2008, 07:52 PM #6Senior Member


- Join Date
- Mar 2007
- Location
- Montreal, Quebec
- Posts
- 610
Thanked: 147
Brilliant!
Admins should sticky this pronto.
-
The Following User Says Thank You to floppyshoes For This Useful Post:
gssixgun (08-05-2008)
-
08-05-2008, 07:54 PM #7Senior Member

- Join Date
- Feb 2008
- Location
- NE Alabama
- Posts
- 1,113
Thanked: 57
Stickied...
-
The Following User Says Thank You to ByronTodd For This Useful Post:
gssixgun (08-06-2008)
-
08-05-2008, 08:00 PM #8Coticule researcher
- Join Date
- Jan 2008
- Location
- Belgium
- Posts
- 1,872
Thanked: 1212
Outstanding!
Thanks for putting this together.
I've bookmarked it for future reference, but I agree it should be made a sticky, or perhaps converted to a PDF and put in the download section.

Bart.
-
08-05-2008, 08:45 PM #9« Atomium [iron atom BXL]

- Join Date
- Aug 2007
- Location
- The Netherlands, The Hague
- Posts
- 224
Thanked: 43
Thanks gssixgun!
Really great and well explained tutorial
This place is just getting better every day...
-
08-05-2008, 09:23 PM #10Senior Member

- Join Date
- Jul 2008
- Location
- Austin, TX
- Posts
- 219
Thanked: 64
great job...this is awesome!!!
deanfarris likes this.
-
The Following User Says Thank You to Aquanin For This Useful Post:
deanfarris (10-31-2012)


 Reply With Quote