
Results 13,851 to 13,860 of 20499
 91271Likes
Thread: What are you working on?
 LinkBack URL
 About LinkBacks
-
08-18-2018, 11:23 AM #13851Senior Member


- Join Date
- Feb 2018
- Location
- Manotick, Ontario, Canada
- Posts
- 2,768
Thanked: 550
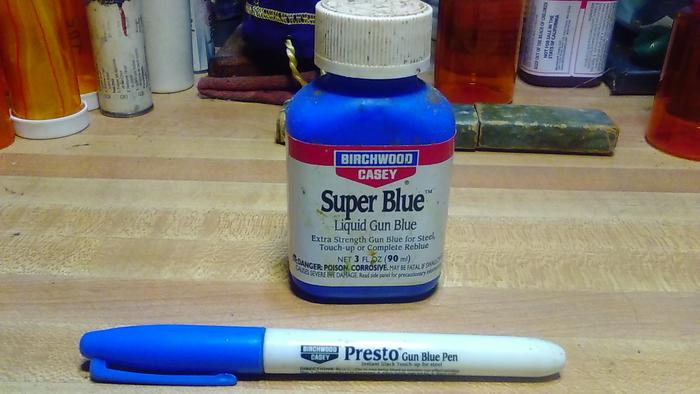
I have a razor that requires the bluing to be touched up. I am hesitant to unpin to do it. Can you offer advice about your process and the bluing you used?
David
Shared sorrow is lessened, shared joy is increased
― Spider Robinson, Callahan's Crosstime Saloon
-
08-18-2018, 07:15 PM #13852Senior Member


- Join Date
- May 2010
- Location
- Upstate South Carolina
- Posts
- 3,308
Thanked: 987
I've been on a bit of an e-bay bender here right before school starts back. I'm determined this year to live the new mantra I learned from my Aussie friends: "No worries, mate!" Not gonna let the job consume me this year. So here are a few fall projects that will be next up on my bench:
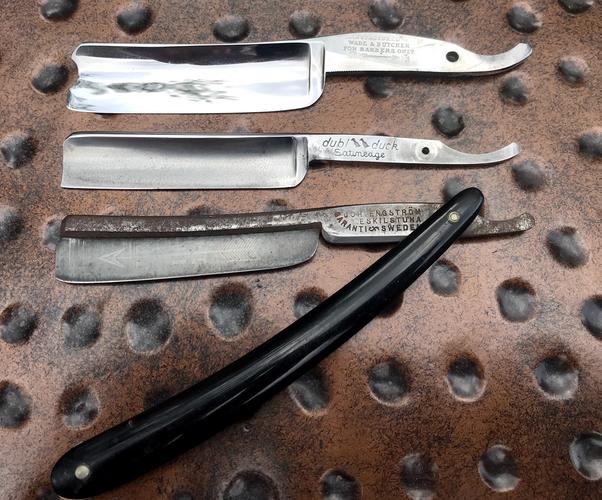
The Engstrom frame-back obviously needs the most hand-work; I may just leave the blade face alone so I don't lose that faint etch. Believe it or not, this is my 1st Swede, though of course I've heard about their legendary steel for years.
The Dubl Duck doesn't need much more than a polish.
The WB FBU I got already cleaned up; she's almost scale-ready. I'm thinking either honey horn with a brass wedge, or paua abalone if I get a wild hair.
More to come on these three.
-
08-19-2018, 12:06 AM #13853Senior Member

- Join Date
- Jun 2015
- Location
- South Carolina
- Posts
- 1,838
Thanked: 516
Now that looks like a fun assortment of blades!
The good thing about those framebacks is that the metal of the frame is easy to work with.
Have fun! Looking forward to seeing the results ScoutHikerDad and outback like this.You must unlearn what you have learned.
Yoda
-
08-22-2018, 01:42 AM #13854Senior Member


- Join Date
- Mar 2015
- Location
- Akron, Ohio
- Posts
- 11,939
Thanked: 4300
Its a cold blueing process, just follow the directions on the bottle. Birchwood & Casey's Super Blue, is what its called. Originally Posted by DZEC

For best results, make sure all of old blueing is removed, and metal bright and clean. It may take several applications, to get the desired look.
They also make a pen/marker, for touch ups.
 Mike
Mike
-
-
08-22-2018, 02:05 AM #13855Skeptical Member


- Join Date
- Nov 2016
- Location
- Colorado Springs
- Posts
- 10,476
Thanked: 2182
WOW!
I th8nk that was one of the longest gaps in this thread. 3 full days!outback likes this.It's just Sharpening, right?
Jerry...
-
08-22-2018, 02:07 AM #13856Senior Member
- Join Date
- Mar 2015
- Location
- Akron, Ohio
- Posts
- 11,939
Thanked: 4300
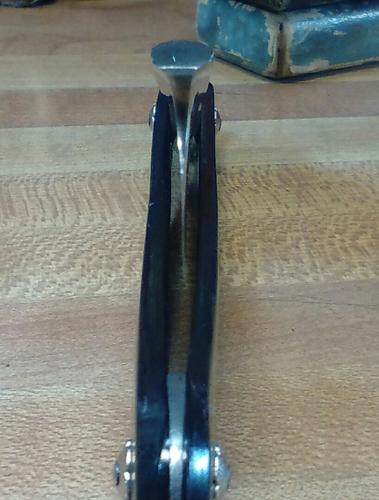
Been working on my Northfield Rattler for the past few days.
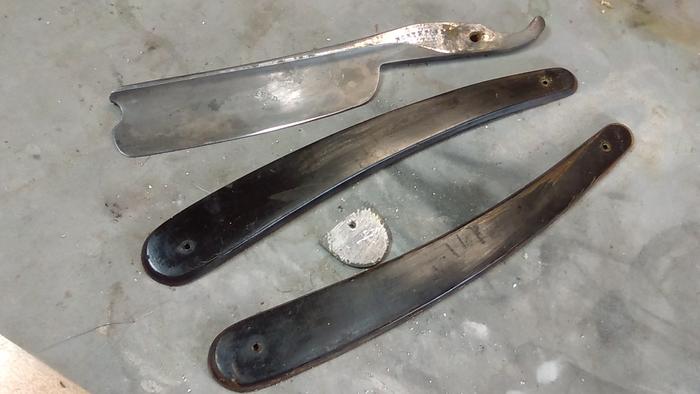
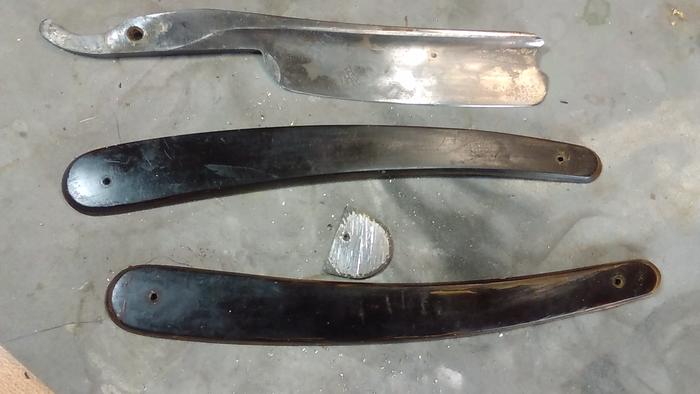
Just the usual. Unpinn, clean n flatten the scales, sand and a soak in neats foot oil.
The blade took a lot of elbow grease, with steel wool n 3M, Emory on a oily rag, Never Dull n 3M, then polished by hand with Flitz. Pinned with silver nickle rod, and Austin's silver nickle rosettes.
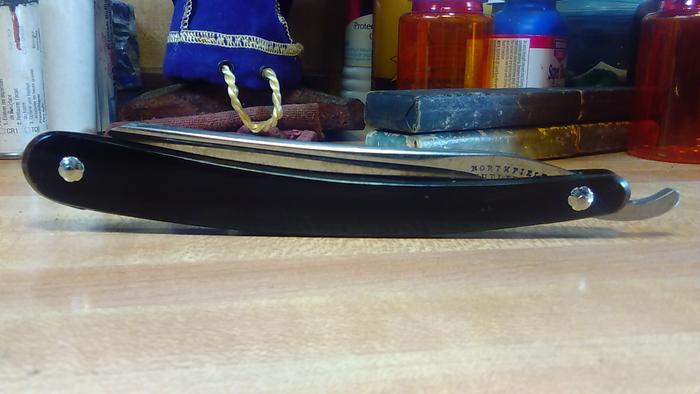
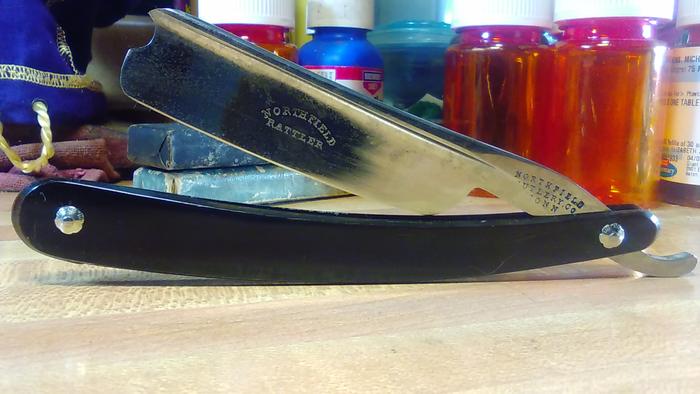
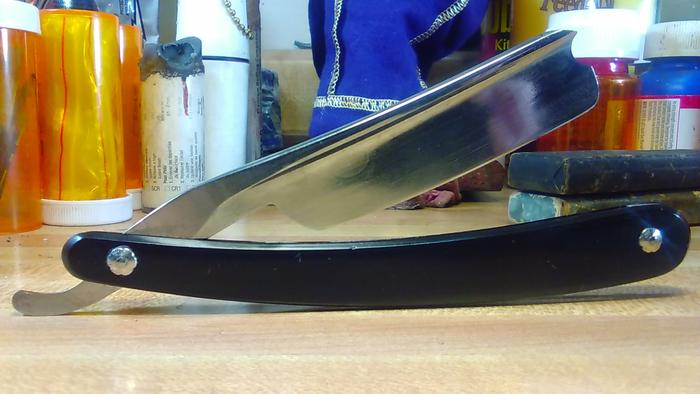
It took everything inside me to keep from putting sandpaper to this one, there's a bunch of fine pitting on the blade, but all I had to do was look at how thin the grind was, and think how I sanded my first restore, to foil.
Nope..!!! Ain't doing it.!!
To the hones, and a test shave in store for tomorrow.

Last edited by outback; 08-22-2018 at 02:09 AM.
Mike
-
-
08-22-2018, 02:52 AM #13857Senior Member

- Join Date
- Jan 2013
- Location
- Communist State of California
- Posts
- 1,461
Thanked: 463
I have used the blueing pen that outback posted for touch ups as well as complete reblueing without removing the scales. It's important to have the steel very clean before you start and wipe it down with alcohol. Then use some masking tape on the heel of the blade so that you get a nice clean line. Then just use the marker on the area to be blued. After a few minutes use a toothbrush under running water to remove the oxidation, dry it off and repeat. It will take several application's to get it dark and even. After the last application you want to be sure to remove all of the oxidation and blueing chemical to prevent further oxidation. You'll want to let it air dry for a day or two or you can dry the pivot out with a hair dryer. Originally Posted by DZEC
Last edited by BeJay; 08-22-2018 at 02:55 AM.
B.J.
-
-
08-22-2018, 11:58 AM #13858Senior Member
- Join Date
- Jun 2015
- Location
- South Carolina
- Posts
- 1,838
Thanked: 516
That looks great Mike! I've made the mistake of too much sanding too, a very good reminder, thank you.
Also B.J. and Mike thank you for the bluing info.
I'm trying to take the time to write these lessons down in my notebook when you guys post them.. very helpful!
Organizational skills are definitely NOT my strongpoint. Lol
 You must unlearn what you have learned.
Yoda
-
08-22-2018, 12:45 PM #13859Senior Member
- Join Date
- Mar 2015
- Location
- Akron, Ohio
- Posts
- 11,939
Thanked: 4300
To add to the blueing process, always put a thin coat of oil over the blueing, once finished with the last application, and its dry. This is part of the curing process, as it sits over the next day. I prefer to use Hoppes #9 gun solvent.
Last edited by outback; 08-22-2018 at 12:47 PM.
Mike
-
-
08-22-2018, 10:43 PM #13860Senior Member
- Join Date
- May 2010
- Location
- Upstate South Carolina
- Posts
- 3,308
Thanked: 987
Wow, Mike-That rattler with a barber's notch is a beauty, and my kind of razor. Well done! And I like Austin's custom collars too.
-
The Following User Says Thank You to ScoutHikerDad For This Useful Post:
outback (11-28-2018)


 Reply With Quote