
Results 14,311 to 14,320 of 20502
 91280Likes
Thread: What are you working on?
 LinkBack URL
 About LinkBacks
-
10-13-2018, 01:38 AM #14311Razor Vulture


- Join Date
- Oct 2010
- Location
- Lone Star State
- Posts
- 25,868
Thanked: 8588
Man! You are hard-core, Steve! I use some bog-dust and Harbor Freight CA!

Stuff like that goes bad before I can use it, sadly.
Regards,
Short Term Tom

-
10-13-2018, 01:53 AM #14312
Yeah, been there done that. Tired of CA drying up on me. This stuff is worth it. Been wanting to try the white on ivory but haven't yet.The skinny end of the whip tips fit in the red tube on the canned air & I am able to blow the excess out from both ends. I then used a twisted piece of tissue w/un-cure & a piece of copper wire I have & I get it clean every time.
-
The Following User Says Thank You to engine46 For This Useful Post:
sharptonn (10-13-2018)
-
10-13-2018, 02:27 AM #14313Senior Member

- Join Date
- Jun 2015
- Location
- South Carolina
- Posts
- 1,838
Thanked: 516
Thanks Steve! I'm always adding to and editing my tools and supply list.
I haven't bought new CA yet, planning on getting thin and thick, now ill need to add black CA!
Probably have a little different look than Bog CA..?
Maybe for different scale finishes or materials?You must unlearn what you have learned.
Yoda
-
10-13-2018, 02:33 AM #14314Senior Member

- Join Date
- Jan 2018
- Location
- Illinois
- Posts
- 277
Thanked: 47
See, that's what I'm talking about.
There is so much knowledge in this thread alone. I'd be lost in this hobby without it!
-
10-13-2018, 02:36 AM #14315Razor Vulture
- Join Date
- Oct 2010
- Location
- Lone Star State
- Posts
- 25,868
Thanked: 8588
I suppose getting lots of projects lined-up for it (and actually doing them) are paramount to getting the money's worth within a year or so?
Stuff looks 'spensive.
-
10-13-2018, 02:57 AM #14316
Yep. I have one bottle of the Bob Smith Industries that dried up but not before I used it a lot. I have medium & thick but I hardly ever use those. That un-cure is some good stuff. It dissolves the CA enough to get it off my fingers. I used to sand it off my fingers! It worked. I got that off the bay a couple years ago.
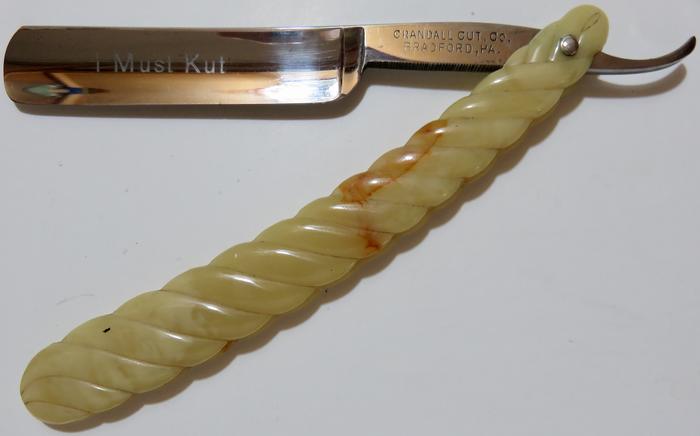
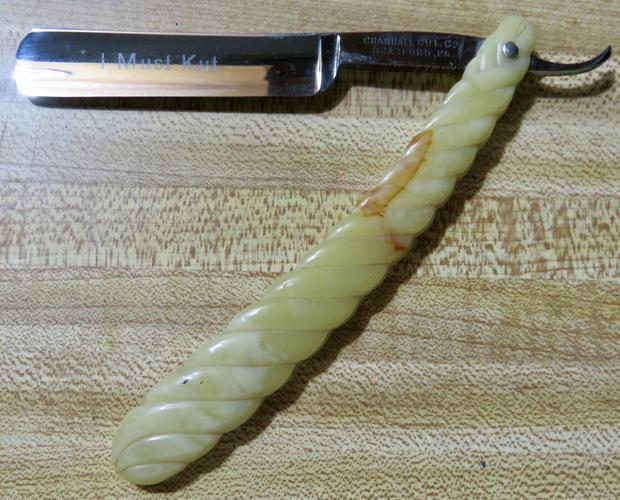
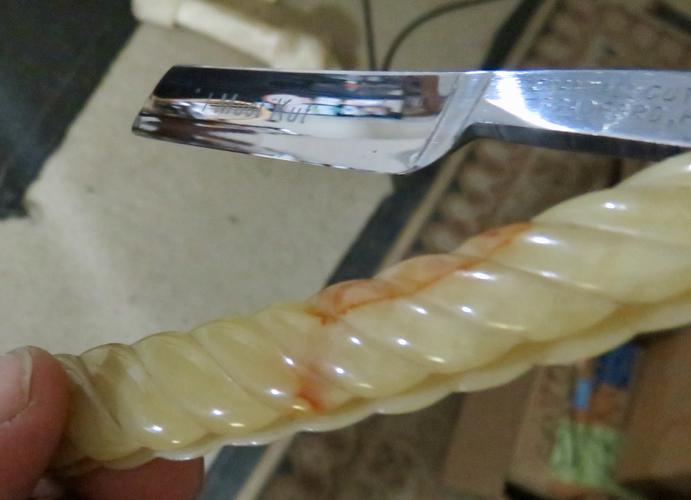
I recently pinned a razor together but need to finish honing it. It's a Crandall Cutlery for my Case family collection. I had the blade only & I used some rope scales like they originally used back then. it was perfect but someone must have come around one time when I wasn't home & I had everything in my master br when my dog must have been going crazy because I got home & it was a mess. Lucky it wasn't worse. A tiny nick under the 'T" in Kut.
I had my Top Flight out not long ago & now I can't find it but I will.
-
10-13-2018, 03:11 AM #14317
Shaun, I have a piece of 1" key stock about 9" long & I drilled some 1/16" holes with different depths so I peen one end first, put it in the razor, get the length right & peen away.
 Originally Posted by RezDog

-
10-13-2018, 04:02 AM #14318Senior Member

- Join Date
- Aug 2017
- Location
- Texas
- Posts
- 275
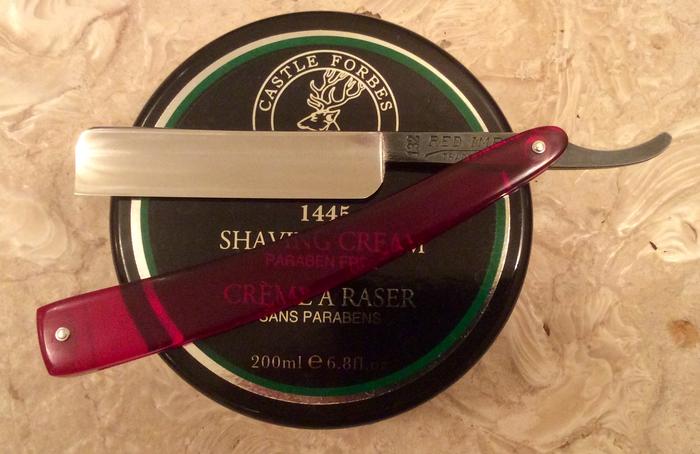
Thanked: 70 Case Red Imp Wedge
Ive been looking for a chance to buy a Case Red Imp 132 at a reasonable price, and just got one. Blade was in good shape, but old rubbery scales.
Polished, re-blued, new scales, and honed up for tomorrow:
-
10-15-2018, 05:35 AM #14319
Got my Crandall honed, just needs stopping. i started with the green brick followed by 2k, 3k, 5k Chosera's then to my Snow White, 10k Chosera & 20k Suehiro. this time I made a slurry with each gradually ending up with just water.
-
10-15-2018, 11:16 AM #14320Senior Member


- Join Date
- Mar 2015
- Location
- Akron, Ohio
- Posts
- 11,944
Thanked: 4300
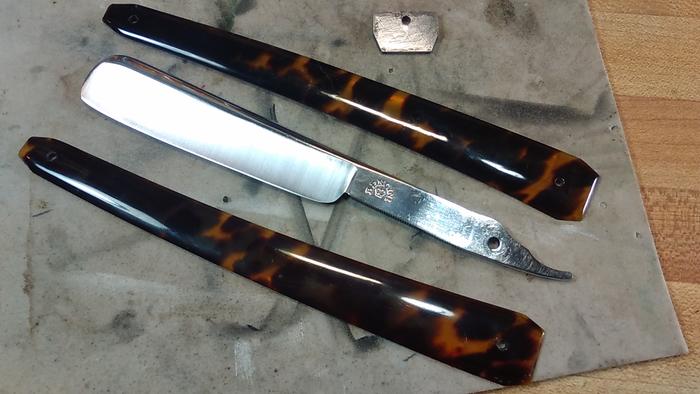
Started work on a Bencini, for MikeT. Its in pretty good condition, but I still separated it to clean up the tang, and straightend out the sanding marks on the blade.
After unpinning, I realized that the pins were larger than the norm, making 1/16 rod impossible to pin with.
So....I used some rivets that Tom had sent me, to take up the slack.
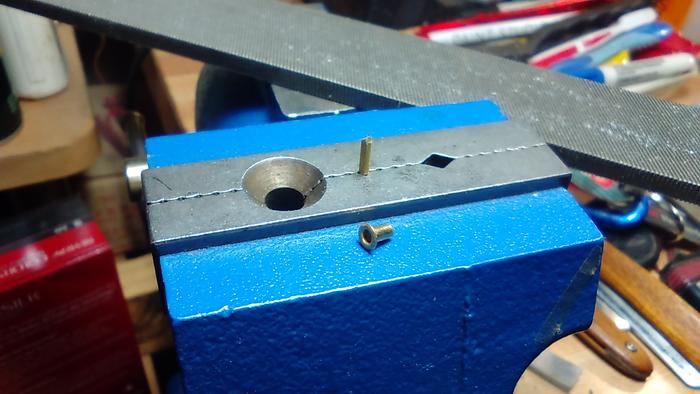
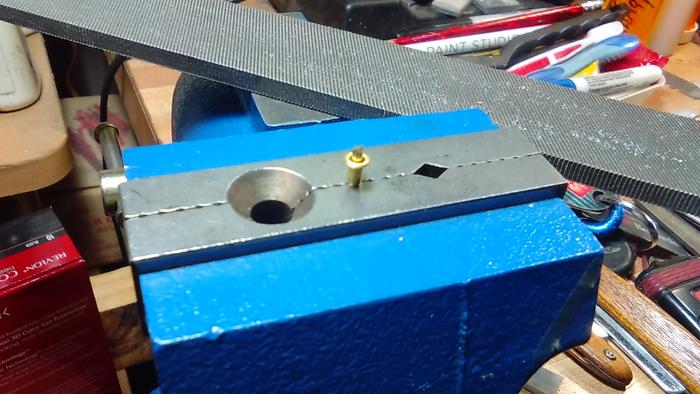
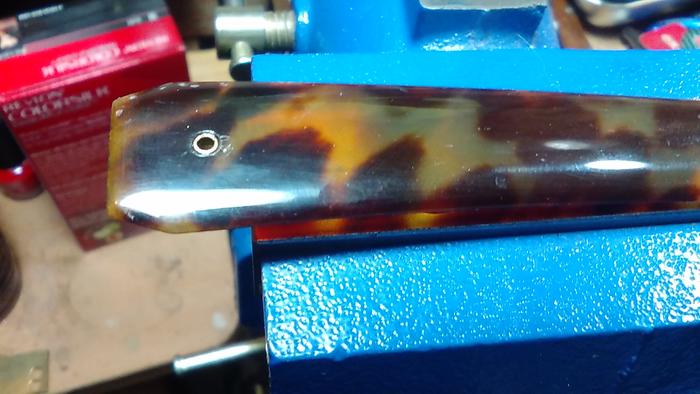
To get the right thickness, I place an old piece of pinning rod in the vice, placed the rivet on the rod, filed it down till they sat just below the surface of the scales, then a drop of CA on a toothpick rubbed inside the pin holes of the scales. Lay the scales over the rivet...presto, perfectly set, and ready for pinning.

 Mike
Mike
-


 Reply With Quote

