Results 11,301 to 11,310 of 20516
Thread: What are you working on?
-
10-21-2017, 05:08 AM #11301

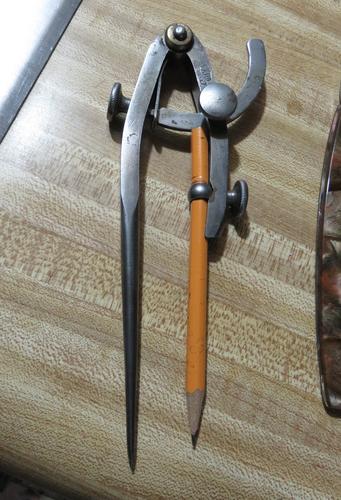
The other day, I read where someone was going to try & put the smile back on a swayback blade. I figured I would share my way. I have a Wosty that is about 7/8 at the toe & between 13/16 & 6/8 at the heel so I got out one of my compass tools. I made it where the pencil was shorter than the other side & I adjusted it at the narrowest width of the blade. I made a nice mark going from heel to toe on it that matched the spine but it needed to be darker so I taped a fine point Sharpie to the pencil & you can see a rough idea of what I got.
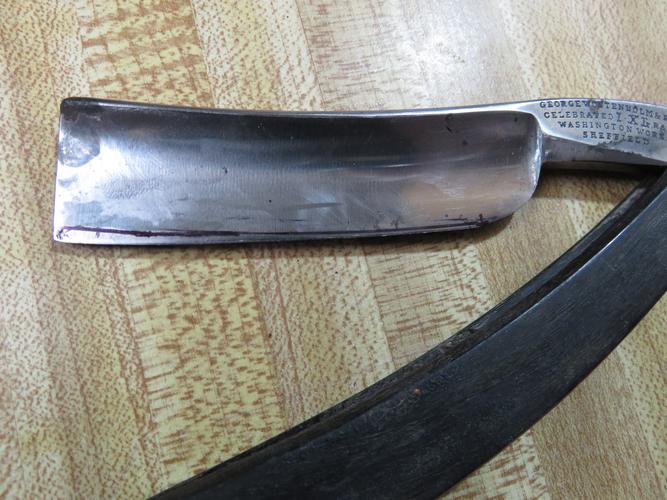
For those who don't know, always grind any excess off lengthwise & not perpendicular to the edge or you will break the blade!!!
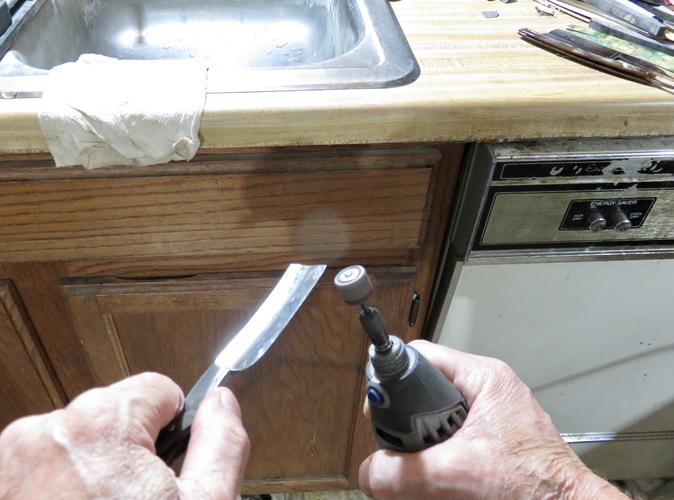
A bench grinder or Dremel can be used but make sure you have a glass of water to cool it. Once you're done, the razor won't be the only thing smiling!
Of course my line isn't exactly at the grinding area but you get my point. Keep 'er as wide as possible.
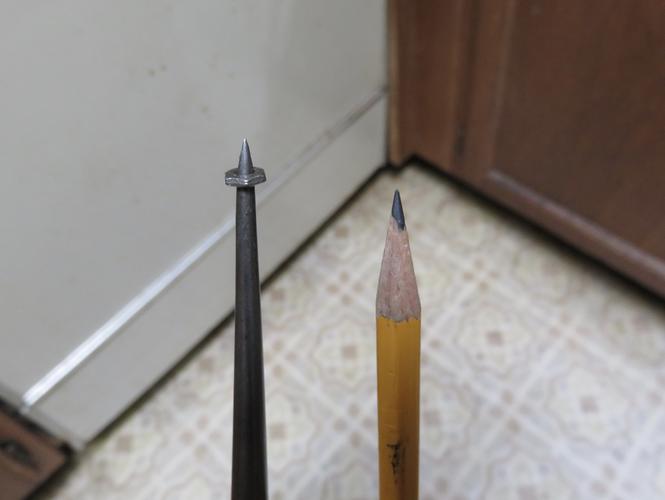
EDIT: I forgot to mention it is a good idea to put a washer or similar (like I did here) to keep from accidentally pushing in & out a little when going down the spine with it:
Last edited by engine46; 10-21-2017 at 04:24 PM.
-
-
10-21-2017, 12:24 PM #11302

I like that idea! I always trace the spine on paper then check the edge to the tracing as I'm running on my diamond plate until I get to the lower end of my 3 measurements. This seems a bit quicker, must admit though I'm not a fan of power tools even after a couple years of doing this. Had one stupid incident and have pretty well steered clear. I'm gonna try this anyway, thanks!
Nothing is fool proof, to a sufficiently talented fool...
-
10-21-2017, 12:59 PM #11303

Eric, I should have put that power tools aren't required to do this. I was basically showing how to make the mark on the blade. I have used a DMT to grind down a blade before but I have also done it like the way shown. Nothing will usually happen to the blade if ground correctly, kinda like the correct way of using a Dremel but in this case it applies to a bench grinder too.
-
10-21-2017, 01:41 PM #11304

I too damaged a blade with a dremel. But was lucky enough to save it and make a shorty. The dremel and sharp objects bothers me. Bench grinder seens a bit safer of the DMT is best but slow. Sometimes slow is just a better way to go. Great idea on the way of doing it 46. Just another option to put in my books. I normally trace spine on paper twice at the spacing I want the blade to be and get to work.
It's just Sharpening, right?
Jerry...
-
10-21-2017, 02:11 PM #11305

I'm gonna give the Dremel a shot. Last time I had a power roll wreck a blade it was a GD thank God and I was trying to buff it. Threw it right on the garage floor and broke it. I took it as a sign from above to knock that crap off and get a real blade to repair. But this seems way nicer when doing a major blade correction.
Nothing is fool proof, to a sufficiently talented fool...
-
10-21-2017, 02:17 PM #11306
-
10-21-2017, 03:35 PM #11307

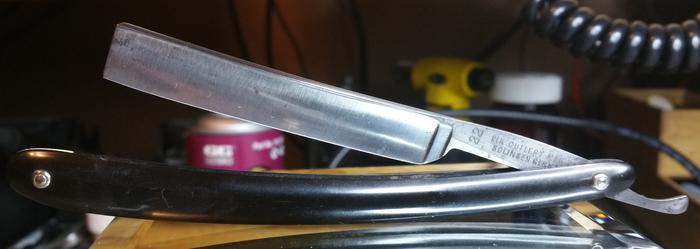
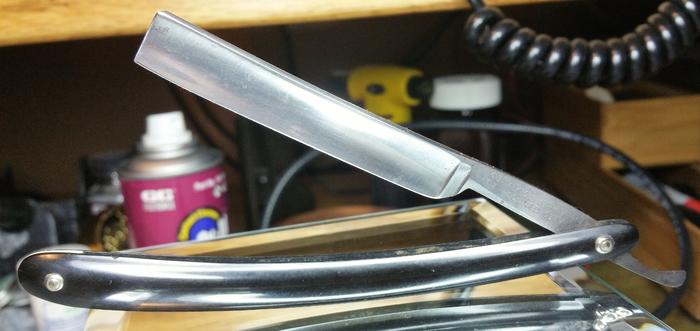
This Elk Cutlery still has a bit of pitting on the edge on one side near the edge but I think its going to survive. Had a wavy edge. now its got a matching smile to the spine. Re-worked the stabilizer but it might need a touch more work on it. I'll put it on the stones today and hope for the best. still needs a touch more cleaning inside the scales but its about ready.
I tried the Rubbing alcohol on the yellow scales after the pin test. It didn't smell like burning hair so not Horn. After a couple minutes in the Alcohol it started to feel gummy so it was melting. Plastic is my guess. I melted a little channel on the inside of the crack and will dab some CA in it. Might end-up with a little dirty crack look but I feel this might turn out ok. Guess I'll see when I pin it.It's just Sharpening, right?
Jerry...
-
10-21-2017, 06:16 PM #11308

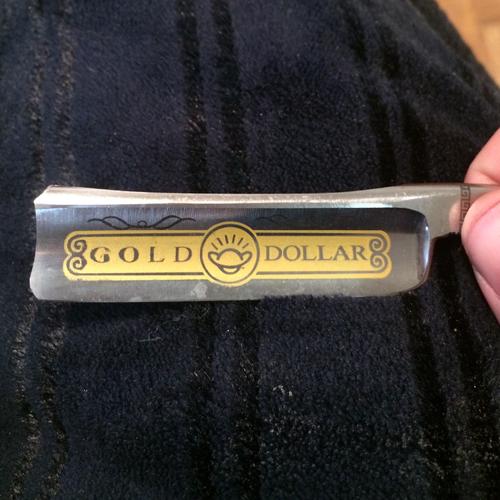
Playing around with a GD. I reshaped the tip and now Iím grinding a sway into the spine. Then maybe a thumb notch and the badly need heel work. Iíve had this one for a while and it will take a nice edge so it may turn out to be a decent little razor when Iím done. If I like how it comes out Iíll make some nice scales for it.
 B.J.
B.J.
-
10-21-2017, 09:05 PM #11309

As I posted before I helped clean out my best friends home after his passing about a week ago or so. However I had commitments and couldn't help for all four days (God what a Pack Rat!)
Anyway my friend was staying with me and he brought me something that they'd found and I've been busy cleaning it up. It will come in handy when I travel on the Harley.
Between the flash and the LED lighting the first pic isn't very good the second was from yesterday using light from the window.
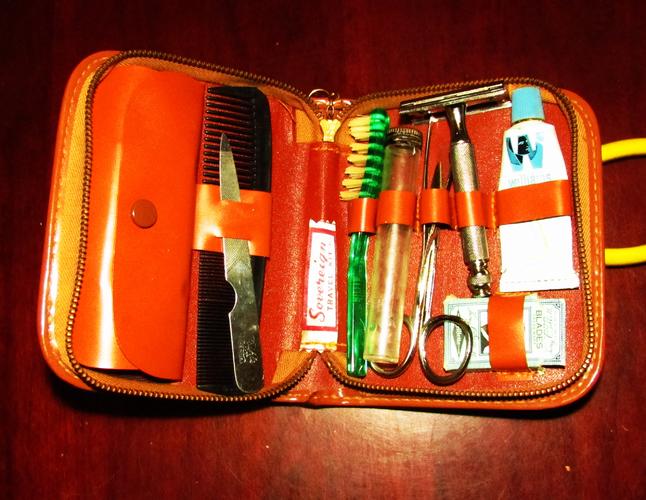
The razor is a Gillette made the first quarter of 1932 and looks brand new. It didn't need any more than a good sanitizing/no metal polish of any kind.
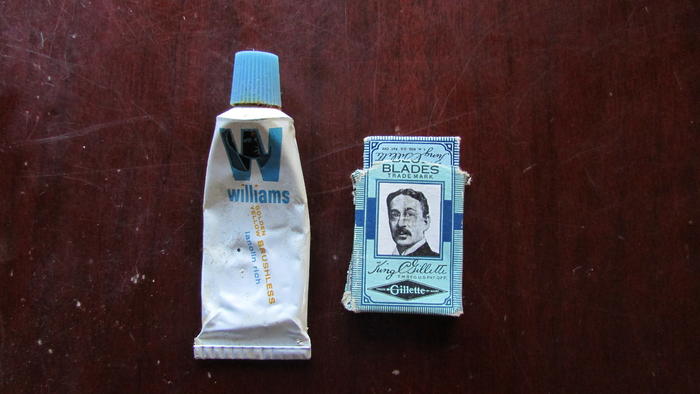
Any ideas of how old the blade and or the Williams is? Our house is as Neil left it- an Aladdinís cave of 'stuff'.
Kim X
-
10-21-2017, 10:12 PM #11310

Don't do as I did, I used a coarse HF diamond plate sharpener and did the bevels too..
BAAAD idea! The scratches were so deep that I lost a lot of width just trying to keep the bevel from breaking off as I honed it. Wouldn't hold till I had gotten to the bottom of those lengthwise scratches; only visible by polishing the bevel...

~Richard
PS. Use a plate perpendicular to the edge toward the end of th shaping.Be yourself; everyone else is already taken.
- Oscar Wilde
-


 91319Likes
 LinkBack URL
 About LinkBacks


 Reply With Quote


