
Results 1 to 10 of 22
 6Likes
 LinkBack URL
 About LinkBacks
-
07-29-2012, 07:55 PM #1Senior Member


- Join Date
- Jul 2012
- Location
- Grain Valley, MO
- Posts
- 272
Thanked: 72 Rookies first polished razor w/ pics
Alrighty gentlemen,
I have been shaving for about 1.5-2 months now. I feel like I take pretty good care of my razor. Rinse it with water after the shave, wipe it dry, sterilize with rubbing alcohol, leave out open to dry for 2-4 hours, strop, box it, and put it in a drawer in my bedroom. However, I started to notice a little corrosion after probably the 3rd shave or so. I didn't know if it had happened since my purchase or if it had always been there so I started to freak out a little. I let it go for a while but after a few more spots of corrosion started to show up I didn't want to run the risk of my brand new toy rusting out. So I nabbed some Mothers polish from our shop at the house, it is actually a non-abrasive aluminum polish, I used this because it is what we happened to have in the shop. I know polishes can be expensive and didn't feel the need to go buy brand new stuff specifically for my razor before giving what I had a shot. I had this because we (Dad and myself) have a barn primarily used for machining (that's Dad's department, not mine), but we also do woodworking, car stuff, and just about everything in there. The way I said that makes it sound like it's our source of income, it's not, it's just a typical man-cave where we do our hobbies and a few side jobs at.
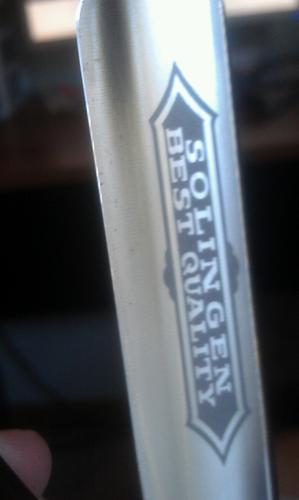
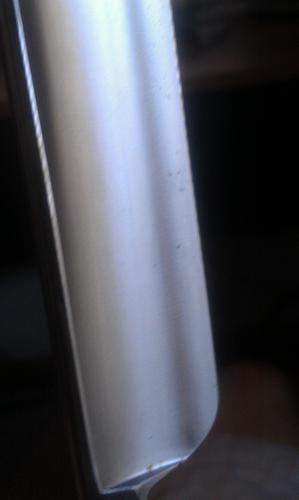
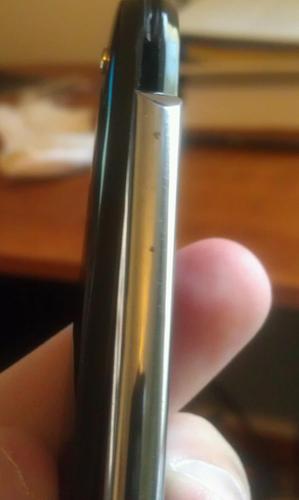
Anyway, sorry for rambling about that. I gave polishing my Dovo 6/8" half-hollow a shot, and I think the results turned out quite nice. There was some corrosion on both sides of the blade near the edge and 2 spots on the spine. I put the "before" pictures before the "after" photos and arranged them so that each image following the "before" is the same side "after". I set it on my desk when I was done and couldn't resist taking a picture because it was sitting there looking so pretty!
For the actual polishing itself, I just used a piece of leather that we use to polish other stuff. We have the buffing/polishing wheels, but I thought that was a little extreme since my razor didn't have a mirror finish on it to begin with. I just dabbed a little on the leather and got to work, wiped clean with a clean cotton rag, dabbed more on the leather, wiped clean, and repeated for both sides and the spine until I was happy. It turns a nasty gray/black color after a little while, when it reached that stage is when I would wipe it off and reapply. I went in small circles going clockwise for a little bit then counter clockwise. Below are the pictures, I hope the pictures are large enough to see the corrosion.
I hope this post helps somebody somewhere who isn't sure about polishing their razor. It's not rocket science, but I would imagine that it gets a lot harder when using buffing/polishing wheels and trying to get that mirror-like finish on a blade. I wasn't concerned with trying to get a mirrored finish on it either because like I said earlier, this specific razor didn't come with that kind of finish. It was also my first attempt at polishing a razor so my goal was to just get rid of the corrosion and prevent future rust, I think I have achieved it well for my first time. I might try to bring a mirror finish back to life if it starts to fade in the future on other razors that I will acquire. Needless to say, I reached my goal for this polish and am happy. Sorry for the long post, I hope everyone enjoys the read!
Happy shaving!
 <BEFORE....AFTER>
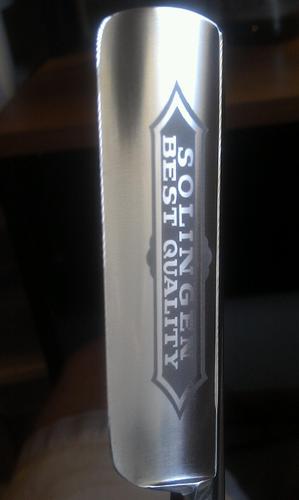
 <BEFORE....AFTER>
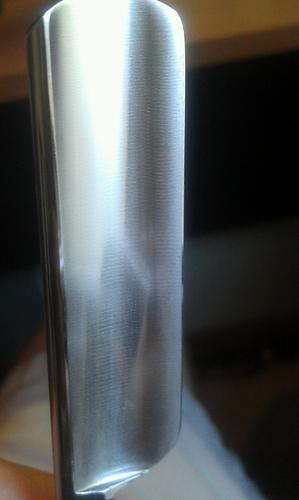
 <BEFORE....AFTER>
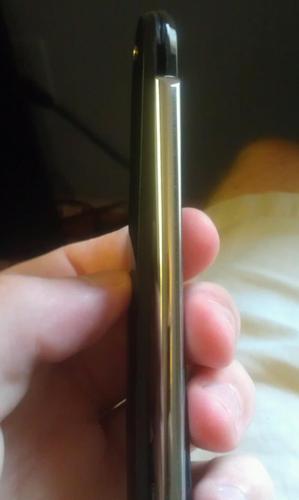
 DAAAAAAMN!!!
Cheers,
ZacLast edited by MuskieMan33; 07-29-2012 at 07:58 PM. Reason: Formatting error
-
The Following User Says Thank You to MuskieMan33 For This Useful Post:
mapleleafalumnus (07-30-2012)
-
07-29-2012, 09:03 PM #2Predictably Unpredictiable

- Join Date
- Jan 2010
- Location
- Northern NJ
- Posts
- 3,588
Thanked: 1487
Very nicely done. I'm interested to know what type of leather you are referring to.
Thanks.Two things are infinite: the universe and human stupidity; and I'm not sure about the universe.
Albert Einstein
-
07-29-2012, 11:32 PM #3Senior Member
- Join Date
- Jul 2012
- Location
- Grain Valley, MO
- Posts
- 272
Thanked: 72
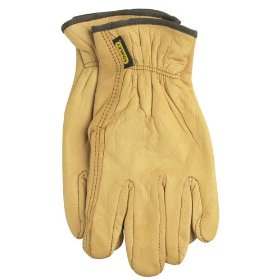
It was actually a piece from an old leather glove. Nothing fancy, just a multipurpose shop/garden glove. I don't know how to describe them, they are leather on both sides, come in S/M/L, no adjustment straps or straps at the wrist for a tight fit. I cut a little square about 2.5" x 2.5" put my index finger on one side and hold the remaining leather around it (almost like half-wrapping my finger). I'm sure there are other ways to do it, but that is what I did. Hope that made sense.
-
07-29-2012, 11:44 PM #4Senior Member

- Join Date
- Jan 2011
- Location
- Roseville,Kali
- Posts
- 10,432
Thanked: 2027
Great Idea, leather is great for loading up with polishing media,My tormek has a leather wheel for final polishing with pastes.
-
07-30-2012, 01:48 AM #5Senior Member
- Join Date
- Jul 2012
- Location
- Grain Valley, MO
- Posts
- 272
Thanked: 72
I was planning on using Q-tips or something but Dad said I should use leather. He said that's what they do at work and I'd guess machine shops polish quite a bit. So I did what he said and it worked out great! After he said to use the leather I could see that it would hold polish better than other methods of application. However, I didn't use a wheel, I just had a small square cut out that I rubbed on in circular motions. Worked out great! I never thought I'd be polishing a razor so soon, but after doing to and seeing how much shine it brings back, I might do it more regularly!
Havachat45 likes this.
-
07-31-2012, 04:04 AM #6'tis but a scratch!


- Join Date
- Oct 2010
- Location
- Durango, Colorado
- Posts
- 2,080
- Blog Entries
- 2
Thanked: 443
Hi Zac,
Nice work! You can put some wax on the blade to keep it shiny and prevent further corrosion. Renaissance Wax is what a lot of us use. I like it most because it makes the blade rinse clean so much more easily. You can put it on the scales, too.
Best wishesMuskieMan33 likes this."These aren't the droids you're looking for." "These aren't the droids we're looking for." "He can go about his business." "You can go about your business."
-
The Following User Says Thank You to roughkype For This Useful Post:
MuskieMan33 (07-31-2012)
-
07-31-2012, 04:38 AM #7Junior Member
- Join Date
- May 2012
- Posts
- 7
Thanked: 0
Where could I find Renaissance Wax?
Thanks.
-
07-31-2012, 04:40 AM #8Junior Member
- Join Date
- May 2012
- Posts
- 7
Thanked: 0
 Originally Posted by MuskieMan33

Was it a glove like this?
-
07-31-2012, 05:47 AM #9Senior Member
- Join Date
- Jul 2012
- Location
- Grain Valley, MO
- Posts
- 272
Thanked: 72
Pepe, yes, it was a glove very similar to that. I guess that's what they do at the place my Dad works at. It worked out fine for me! Granted there wasn't a ton of corrosion.
Rough, I will have to get my hands on some Renaissance Wax. As for the scales, would it damage wooden scales? The plastic ones that came on my Dovo broke at the pivot pin, I noticed this today after my shave . So I will be rescaling my pride and joy sooner than I thought I ever would! I put a minor fix of some plastic adhesive (basically model glue or JB Weld). Ran up to the shop today when I noticed it and grabbed a piece of maple and walnut, I've got a pretty good idea of what I'll be doing as far as the design goes. It will be primarily walnut with a small maple accent in it. I was thinking maybe like an "X" pattern in the wood, something like the following.. Where the yellow is the maple and the brown is the walnut.

Last edited by MuskieMan33; 07-31-2012 at 05:49 AM.
-
07-31-2012, 04:10 PM #10'tis but a scratch!
- Join Date
- Oct 2010
- Location
- Durango, Colorado
- Posts
- 2,080
- Blog Entries
- 2
Thanked: 443
Guys,
I got my Renaissance Wax at Restorer Supplies, www.RestorerSupplies.com. It's fine on wood, but I don't know if I'd count on it as the only finish you use. Check out the Workshop threads for all sorts of discussion on finishing scales.
Best wishes"These aren't the droids you're looking for." "These aren't the droids we're looking for." "He can go about his business." "You can go about your business."


 Reply With Quote