
Results 1 to 10 of 20
 10Likes
 LinkBack URL
 About LinkBacks
-
08-19-2009, 09:51 PM #1At this point in time...


- Join Date
- Jun 2007
- Location
- North Idaho Redoubt
- Posts
- 26,960
- Blog Entries
- 1
Thanked: 13226 Illustrated Guide to making a Lined Wedge
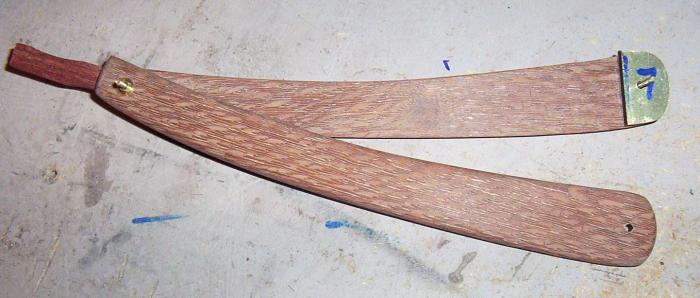
After multiple questions I actually took a camera out to the shop and put this together... Please excuse the quality of the Pics,,,,
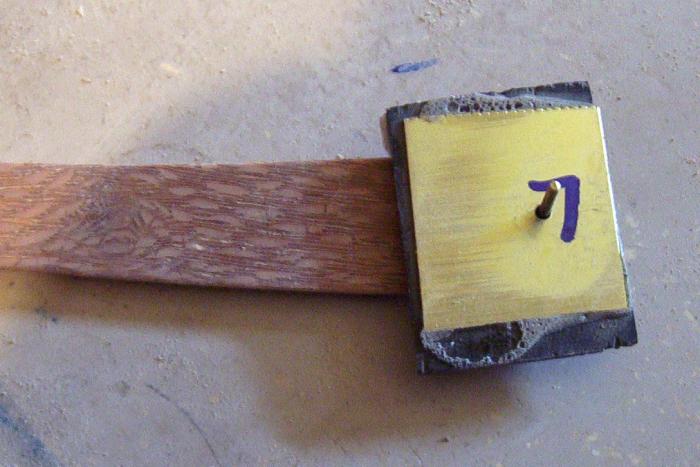
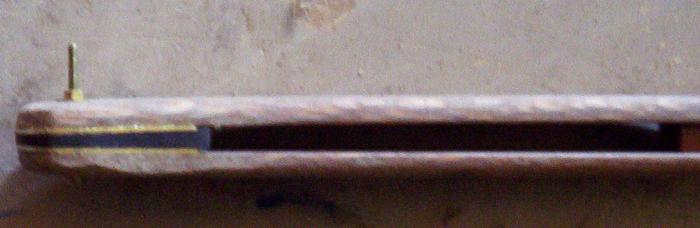
To start, you need a wedge/spacer this one is Ebony you can use whatever you want just make sure it can handle heat...
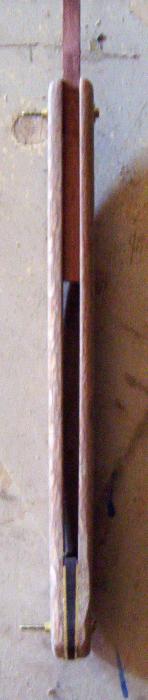
I make wedges not spacers so I start with a thickness of wood about 1/2 the thickness of the spine of the razor I am working with...Making a wedge shape is easy if you have a belt or platter sander just put the wedge down and press harder to one side, flip and repeat as neccesary... You need to take the wedge slightly thinner then normal to account for the brass liners...
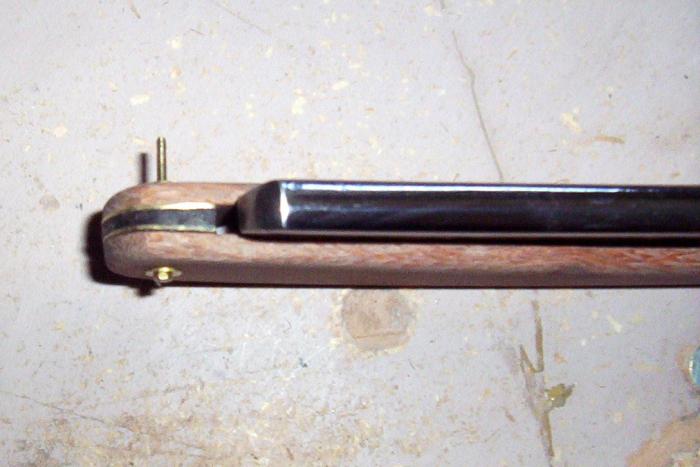
I use K&S brass stock that I am 99% sure is 1/32 in thick it actually is not marked I cut it to approximate size then use Gorilla Glue (TY Seraphim) to attach it to the wedge, I leave this in my vice overnight to set...
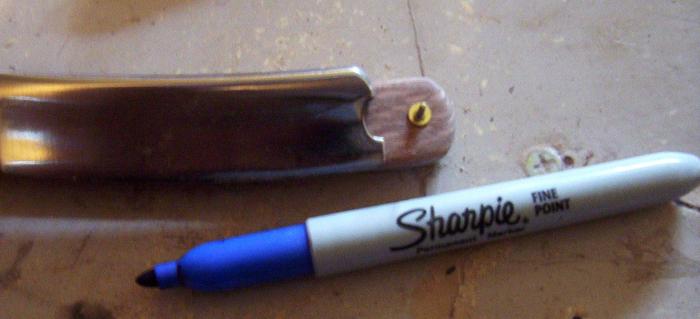
I drill the hole for the pins and always mark it with a Lucky #7, this gives me a reference for top and bottom also...
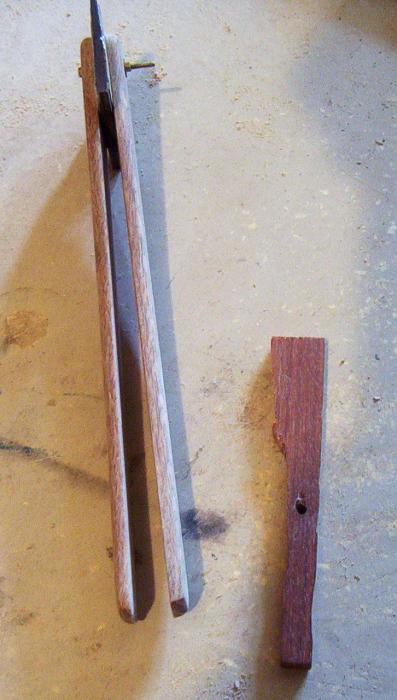
Using Microfasteners 1/16 hex bolts and washer I mock up the razor..
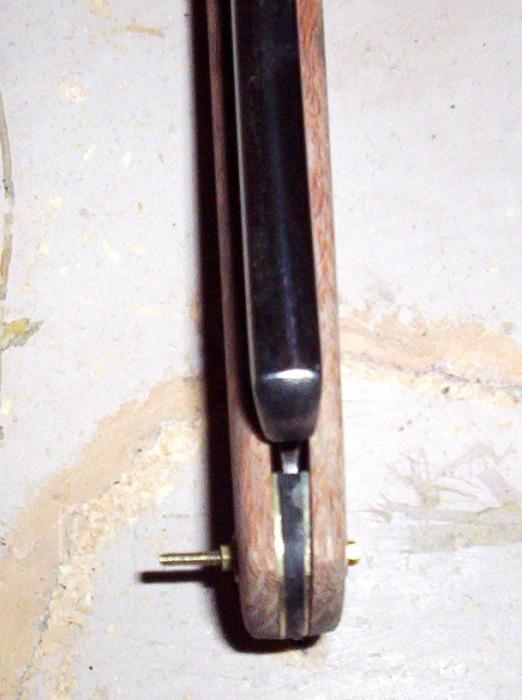
I get everything so that I like the fit and take the whole thing including that mock razor tang to the belt sander and start working it to size (watch the heat)

That stupid piece of wood there is one of the most valuable tools I use, it is a mock razor tang.... I have them in 3 thicknesses, and I use them for everything from sanding to pinning when building scales...
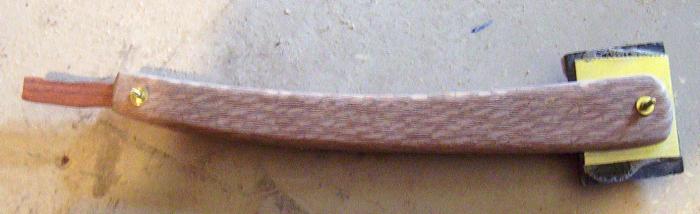
The first check and a rough fit...
A more refined fit and finish, you need to be careful not to mess up the line of the scales by sanding to much, get really, really close then finish by hand....
I use the sharpie to mark the wedge for length so the razor actually fits the scales
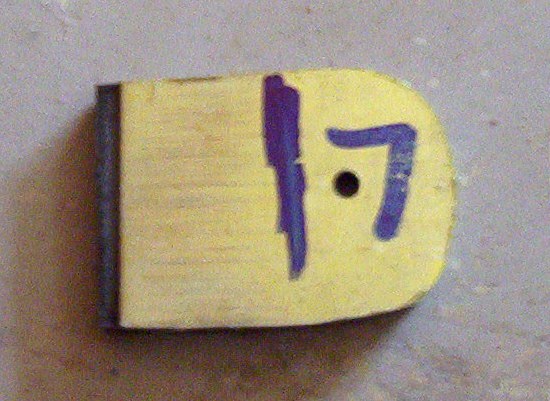
This is how I use that #7 all through the process it tells me the right orientation, you can also see here that the wedge has been shortened to fit the razor...
Last edited by gssixgun; 08-19-2009 at 10:20 PM.
-
The Following 24 Users Say Thank You to gssixgun For This Useful Post:
Alfonnso (05-24-2012), BeBerlin (08-19-2009), Berthold (08-17-2013), BigJim (03-14-2011), BKratchmer (08-19-2009), Buckler (09-09-2010), Chevhead (10-18-2013), Cove5440 (02-17-2012), Del1r1um (10-04-2009), donjcschilde (07-29-2011), Falafel (10-22-2011), Geezer (07-29-2011), JimmyHAD (08-19-2009), keenedge (08-19-2009), Maximilian (08-19-2009), milehiscott (12-22-2011), mrbhagwan (08-19-2009), onimaru55 (08-24-2009), rayman (08-23-2009), Stagehand (08-20-2009), Stropper (08-23-2009), Stubear (08-20-2009), tinkersd (06-10-2012), turbine712 (08-20-2009)
-
08-19-2009, 09:59 PM #2At this point in time...
- Join Date
- Jun 2007
- Location
- North Idaho Redoubt
- Posts
- 26,960
- Blog Entries
- 1
Thanked: 13226 More pics !!!
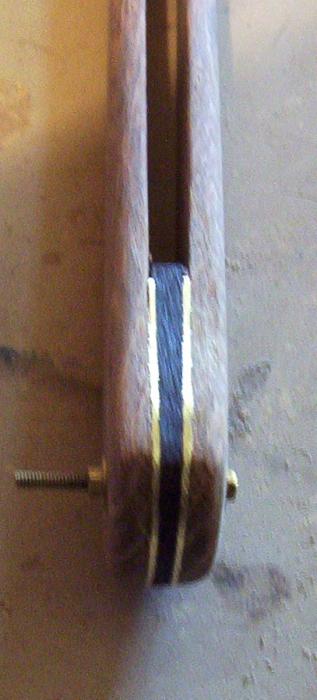
This is about the distance you want before pinning, between the pivot ends of the scales, just enough for a slight flex, this is also a personal preference... I came up with my distance from taking apart a ton of vintage razors and looking really close at them....

Nice tight fit to the razor, I try for about 1/8 but that is a personal thing...
The first check for balance, to make sure I am on the right track...
I hope you get some great hints out of this thread, but also if you have any of your own to add please feel free, and Pics of course are greatly appeciated.....Last edited by gssixgun; 08-20-2009 at 04:27 PM.
-
The Following 20 Users Say Thank You to gssixgun For This Useful Post:
Alfonnso (05-24-2012), aroliver59 (08-20-2009), baldy (08-20-2009), Chevhead (10-18-2013), Cove5440 (02-17-2012), DoughBoy68 (11-28-2013), Falafel (10-22-2011), ignatz (08-20-2009), iwilson (08-23-2009), Johnny J (08-19-2009), keenedge (08-19-2009), Lynn (08-20-2009), milehiscott (12-22-2011), MrZ (09-25-2017), pinklather (11-15-2010), Sando (03-16-2011), sapito318 (08-19-2009), Stropper (08-23-2009), Stubear (08-20-2009), tat2Ralfy (09-14-2009)
-
08-19-2009, 10:00 PM #3Senior Member


- Join Date
- Feb 2008
- Posts
- 32,564
Thanked: 11042
Thanks Glen. That is really cool. I don't know that I will ever make my own but I have been thinking of it more and more. This tutorial will really help a newb to resto like me to get it right.
Be careful how you treat people on your way up, you may meet them again on your way back down.
-
08-19-2009, 10:07 PM #4Senior Member

- Join Date
- Jul 2008
- Location
- Austin, TX
- Posts
- 219
Thanked: 64
Great tutorial!! I have found T-88 epoxy to work better for me. YMMV. I have tried the Gorilla Glue and it seems more sensitive to the heat from the belt sander. But I don't remember how careful I was being at the time

-
08-19-2009, 10:47 PM #5Senior Member

- Join Date
- Mar 2007
- Location
- Montreal, Quebec
- Posts
- 610
Thanked: 147
Well done Glen!
Aquanin, gorilla glue is pretty good with the heat and you can get low-foaming versions. I prefer epoxy though, but only due to it's fast set time.
-
08-19-2009, 11:10 PM #6< Banned Scammer >
- Join Date
- Jun 2009
- Location
- Sunny California!
- Posts
- 466
Thanked: 125
Excellent post Glen, thanks a lot.
-
08-19-2009, 11:26 PM #7Senior Member

- Join Date
- Jun 2008
- Location
- Upstate NY
- Posts
- 5,003
Thanked: 1827
Thanks Glen. Nice write up! I put put a lined brass wedge on the first razor I rescaled, just been too lazy to do it again.
 If you always do what you always did, you will always get what you always got. (A. Einstein)
-
08-19-2009, 11:36 PM #8Senior Member

- Join Date
- May 2009
- Location
- Portugal
- Posts
- 146
Thanked: 104
Thx a lot Glen! That "stupid" piece of wood its a great idea
!
By the way..How do you remove the old pins from a razor, without causing damages to the scales? Im trying to remove some but they are quite "stuck" into the scales..
-
08-19-2009, 11:43 PM #9At this point in time...
- Join Date
- Jun 2007
- Location
- North Idaho Redoubt
- Posts
- 26,960
- Blog Entries
- 1
Thanked: 13226
Look here first then in the Wiki
http://straightrazorpalace.com/works...e-pinning.html
If you are searching through the Wiki I always recommend you follow the links to the original threads, as many questions are asked and answered just like we are doing here, and there are always other hints and things.....
-
08-20-2009, 12:01 AM #10Razor honing maniac

- Join Date
- Jun 2009
- Location
- On the beautiful St. Croix river
- Posts
- 228
Thanked: 51
Thanks for the tutorial it was very informative. One question in regards to the wood wedge.
What is the orientation of the grain? Is the end grain at the end or is it on the top of the scale? If you were using a lighter wood other than ebony, say maple, then how would you orientate the grain?
I think if it was a spacer rather than a wedge it would make sense to put the end grain to the end. Hmmm, I am just wondering what people do?
Thanks again,
turbine712 aka Bill W
-
The Following User Says Thank You to turbine712 For This Useful Post:
cmaxxd (09-03-2009)


 Reply With Quote