
Results 41 to 50 of 61
 39Likes
 LinkBack URL
 About LinkBacks
-
09-16-2015, 04:32 PM #41Senior Member


- Join Date
- Apr 2012
- Location
- Diamond Bar, CA
- Posts
- 6,553
Thanked: 3215
You have a nice strop there and with what you have, you can absolutely get a good shaving edge on your razor.
First, mark a pencil grid and lap the King and the Slate on a sheet of 325 Wet & Dry and bevel the edges. Until you lap the stones flat & smooth, you will never get an edge on a razor. Just one raised grit or burr on the edge of either stone, will ruin any work you have done. The king is a perfectly fine 1k stone.
Tape the spine, and joint the edge on the corner of the King 1k, 1-2 light strokes until you have a straight edge. Then do 20 X laps and look at the bevel. Do sets of 20 X laps on the 1K until the bevels meet. Do not raise a slurry on the King, you do not need it.
Replace the tape, do not skip this step, and lightly joint the edge on the corner of the slate. Now do a set of 20X laps and re-set the bevel. At 50X look straight down on the edge until the bevels meet from heel to toe, below are photos of what it should look like. Do as many set as it takes to fully re-set the bevel, it should look like the 3rd photo.
Once the bevels meet FULLY, Do 20 laps on the Chrome Oxide strop with light pressure, look at the bevel and the edge, the Slate stria should be lessened and the edge should remain straight and meeting. If you muff the edge, re-joint the edge and re-set it with X laps on the Slate, NO SLURRY.
Once you get a nice looking bevel with polished or minimal stria and a straight fully meeting edge, strop 20 laps on plain leather and shave. It may take 3-4 set of 20 laps, you are going from 4-6k to 30K a pretty big jump.
Repeat – make sure the edge remains straight…
Reading the first 3 threads in the Honing Forum will help you and answer many of your questions.
Part of your problem is the slate is not a coticule and the grit is completely unknown, but your chrome ox strop can make up the difference, if done properly, take your time and do not use excessive pressure.
Here are 3 photos of an edge, looking straight down at 40X.
First, is an un-set edge.
Second, the bevel are flat and the edge is almost set, not fully.
Third, a fully set bevel, the edge is just above the sparkles (dust on Lens)
Last edited by Euclid440; 09-16-2015 at 04:37 PM.
-
The Following User Says Thank You to Euclid440 For This Useful Post:
elmoensio (10-19-2015)
-
09-16-2015, 05:16 PM #42Senior Member


- Join Date
- Mar 2014
- Location
- Bergen County, N.J.
- Posts
- 1,265
Thanked: 225
Everything that Euclid440 explained to help you get a good edge on your razor is good advice but I assure you that the green pasted strop you have is not pasted with Chromium Oxide. It is a coarse paste and will probably foul up your attempts at finishing the razor. I own two of those strops and I can tell you the green one is not what you think it is. Please verify this before finishing the razor.
elmoensio likes this.Don't drink and shave!
-
09-16-2015, 06:19 PM #43Member
- Join Date
- May 2015
- Location
- Australia
- Posts
- 33
Thanked: 1
Every day is a school day. Thanks for the news bomb Originally Posted by Razorfaust


-
09-16-2015, 06:36 PM #44Member
- Join Date
- May 2015
- Location
- Australia
- Posts
- 33
Thanked: 1
Do you mean 325 grit sand paper or a specific lapping plate such as DIA-Flat Lapping Plate | The Perfect Edge ? Originally Posted by Euclid440
-
09-16-2015, 07:07 PM #45Senior Member
- Join Date
- Apr 2012
- Location
- Diamond Bar, CA
- Posts
- 6,553
Thanked: 3215
325 Wet & Dry sand paper, you want to use it with water, and any automotive store should carry it. You just need one sheet, buy a cheap cookie sheet, wet the sheet and place the paper on the sheet, the water will stick it to the cookie sheet,
Then rub the stone on the Wet & Dry until the grid comes off. Re mark the stone, spin 180 degrees and do it again any low spot will be visible, the rest of the stone has to be sanded even with the lowest spot. Use pressure and lots of water to keep the paper from loading up.
Once you have removed the pencil grid 3-4 times the stone is flat, now bevel the edges and you’re done. Save the paper and you can use it again.
A diamond plate is easier, but does the same thing.Leatherstockiings and elmoensio like this.
-
The Following User Says Thank You to Euclid440 For This Useful Post:
Leatherstockiings (09-16-2015)
-
09-16-2015, 07:12 PM #46Senior Member
- Join Date
- Apr 2012
- Location
- Diamond Bar, CA
- Posts
- 6,553
Thanked: 3215
I would use the Chrome Oxide strop, because you have it, worst case you will just have to remove it from the strop, re-paste with pure Chrome Oxide. And re-strop and if needed re finish on the slate and re-strop. It is easily removed from the strop with WD40.
The more pure the Chromium Oxide the finer and smoother it will polish the edge. SRD, Kremer Pigments and Hand America are all razor quality pure Chromium Oxide.Razorfaust and elmoensio like this.
-
09-16-2015, 07:44 PM #47Senior Member
- Join Date
- Apr 2012
- Location
- Diamond Bar, CA
- Posts
- 6,553
Thanked: 3215
Looked up the strop and some sites say it is Chrome Oxide and some say it is Dovo “Green Paste” . Dovo Green is rated at 6 micon. Pure Chrome Oxide is .5 micron, which goes along with what Razorfaust is saying.
Many “Green” paste and compounds have other abrasives in them to polish quicker, Aluminum and Diamond. Some do not have any Chrome Oxide at all. What matters is what it does to the edge, which was why I asked what it was you were stropping on, the bevel was too shiny for Chrome Oxide.
Guys have been stropping on Dovo paste for years, so try it, look for a chipping or a harsh shaving edge. Often just a few laps on the green to smooth the rough edge from your slate, probably 4-6k grit range and finish on plain leather. It might work well for you, because you are making such a large grit jump from your finish stone.
Like I said you can strip off the Dovo Green and replace with pure Chrome Oxide, a lifetime supply of razor quality Chrome Ox is about 10-12 dollars US, try it first and see how it works for you, you will see micro chipping on the edge, if it is too harsh.
I have several of those small vintage loom strops and I always strip off the old Chrome Ox and re paste them because the paste is usually contaminated. They are small but work well as strops.elmoensio likes this.
-
09-17-2015, 04:42 AM #48Senior Member

- Join Date
- Jul 2015
- Location
- Colorado
- Posts
- 540
Thanked: 79
First and foremost welcome to the wonderful world of honing! I myself am a newbie to all this so I want to tell you to always feel free to keep posting pictures and keep at it, don't get frustrated not getting it on your first shot. It took me the last month of honing daily to learn how to hone properly. I didnt read though all the comments because sometimes reading what other people say can just get in the way of my thought process and make me just go off of what other people said....
Now as a newbie I also bought myself a microscope 100x magnification, I do not think that the pictures you posted are at the magnification you mentioned. I assume you use a USB microscope and they can be misleading on their magnification. IMO using a microscope has been a valuable tool in my arsenal, reason being is it tells me what I'm doing is helping or making it worse. When I am under the scope I am looking at the edge and scratch patterns, if I see what I would call a wide chip on the edge I will mark the placement and try and work on it until it's either smaller size I can deal with or its gone. Now a problem with microscopes is that u could be chasing something that doesn't need as much attention as u would be giving it. Reason being is because it's magnified and what looks massive could in all actuality really be just insignificant. One thing I did to compare what I was looking at was placing a strand of hair next to what I was looking at and realizing "hey that's tiny" ��
I am familiar with Dr. Matt and his videos, I did learn some things from his videos. But what from what I understand and people will correct me if im wrong but using a coticle to sharpen takes a lot to learn even for experienced sharpens. What I started with the shapton kuromaku series 1k 2k 5k 8k 15k which cost me $250 new. Now what I can say is that the 1k is pretty abrasive compared to other 1k stones Ive used so I don't think you would even need the 1k taking off $50... I'm sure it's not impossible to learn off a coticle and I'm sure people have win persistence. But one thing I will recommend is purchasing some gold dollars, they do have a lot of flaws and you will run into things that are common issues with razors... Now there is a lot against the gold dollar if you are buying them for your first shavers it's not recommended, now you can get a good edge off a gold dollar and you will know if you did a good job honing with it.... I wouldn't be honing the snot out of your expensive razor for the learning curve, I bought the gold dollars myself and not to toot my own horn but a lot of persistence and a lot of advice from the community here has gotten me a long way.... But the way I learned the most was from a friend of mine I met on here Victor aka bluesman 7 my honing ability has jumped leaps and bounds In what I believe to be a short period of time but I was honing daily and met with victor 4-5 times for personal training... So if u can find a meet up in your area I pad highly recommend going!
Hope my story helps you bro, honing is only the beginning and now I'm restoring razors and hope to forge one day... I wish u the best of luck and happy honing
Fonz
-
09-17-2015, 04:04 PM #49Senior Member
- Join Date
- Mar 2014
- Location
- Bergen County, N.J.
- Posts
- 1,265
Thanked: 225
Elmoensio, I see you are from Norway. I think maybe it might be a good idea to contact either Birnando, Str8fencer or Zephyr and see if any of those members might help you with your honing journey. I think you might benefit greatly from some one on one experience with any of these knowledgeable guys. Maybe you will be lucky and one of them lives close by and can help you.
Last edited by Razorfaust; 09-17-2015 at 04:08 PM.
Don't drink and shave!
-
09-17-2015, 07:03 PM #50Member
- Join Date
- May 2015
- Location
- Australia
- Posts
- 33
Thanked: 1
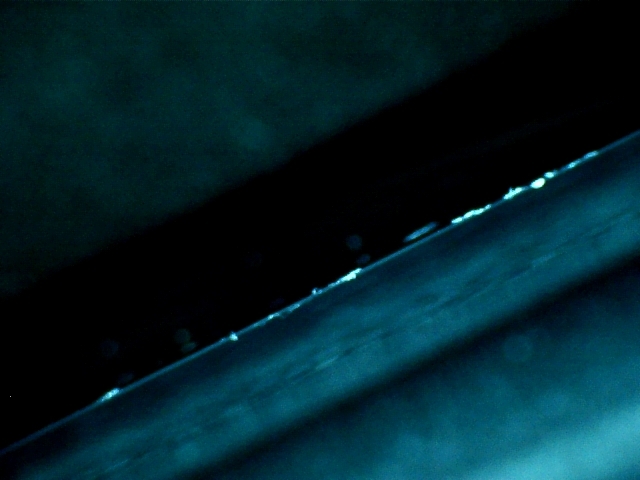
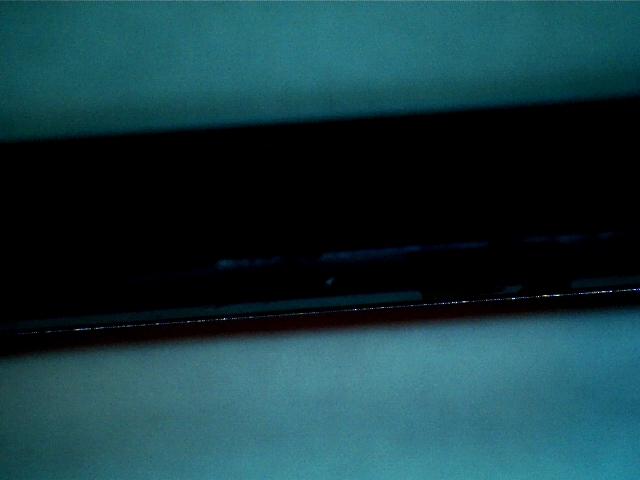
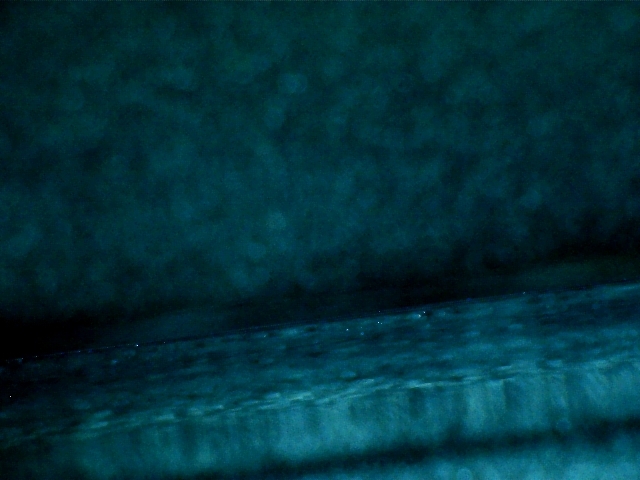
I spent some quality time with my hone and microscope yesterday, systematically seeing the progress as in the attached photos. Each image is 1.1mm by 0.73mm. In the end I imitated the images Euclid kindly posted, looking straight down at the reflection of the edge. I did this for my TI that I'm honing and professionally honed Heljestrand that I shave with.
After the progression described with images the razor did not shave arm hair. So I restarted and used 1k with circular motions until I got it shaving arm hair again. Then circular motions on the Dragons Tongue, 7 laps on green pasted strop and 50 laps on leather strop. I tried the HHT with badger hair and it failed.
It feels good to have made some progress in learning and to have an idea what the outcome should be.
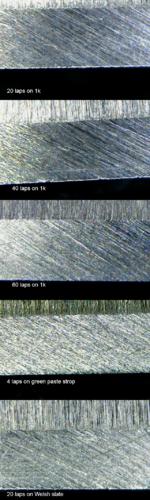
^^^The progression

^^^Edge reflection of Thiers Issard after this progression

^^^Edge reflection of professionally honed Heljestrand


 Reply With Quote